What Causes Freezer Burn (and How to Stop It for Good)
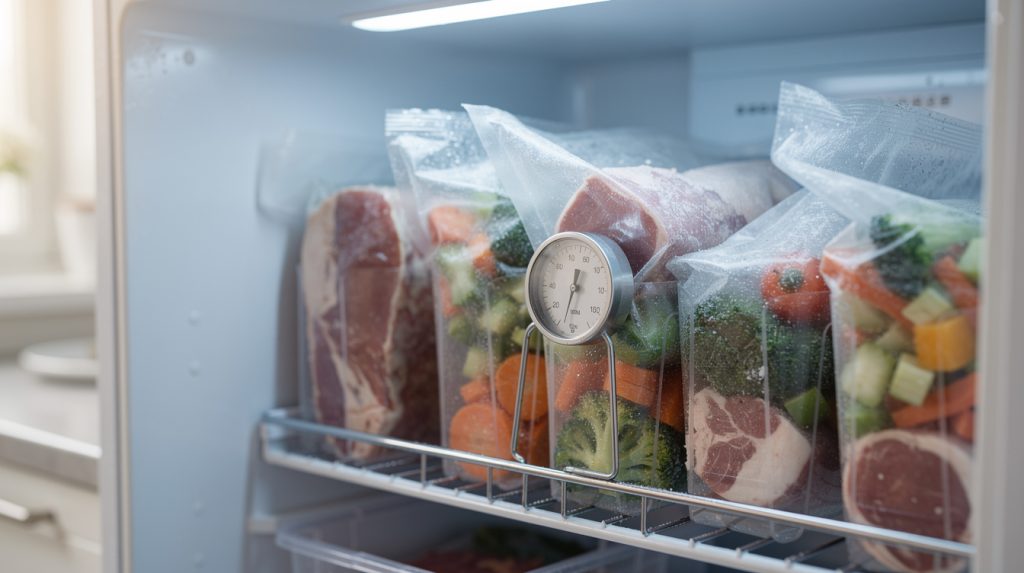
You pull a package of chicken thighs out of the freezer, and the meat looks like someone dusted it with gray chalk. The edges are pale and leathery. There’s a crust of feathery ice inside the bag that wasn’t there in March. That’s freezer burn, and it’s one of the most common things people call us about that turns out not to be a broken appliance at all — until, occasionally, it very much is.
Here’s the useful part: freezer burn follows rules. It’s a physics problem, not a mystery. Once you understand what’s actually happening to that chicken, you can stop about 90% of it with better wrapping and one thermostat adjustment. And you’ll also know how to spot the other 10% — the cases where heavy, sudden freezer burn is your appliance telling you a door seal or a defrost component is failing.
What Freezer Burn Actually Is
Freezer burn is dehydration. That’s it. Frozen water doesn’t have to melt to leave your food — it can go straight from ice to vapor, skipping the liquid stage entirely. That process is called sublimation, and it happens constantly inside every freezer in every house in Tampa.
Ice crystals near the surface of your food turn to vapor. That vapor drifts away from the food and refreezes somewhere colder — usually on the inside of the packaging, or on the freezer walls, or on the evaporator coils behind the back panel. What’s left behind on the food is a dry, porous, air-filled patch where the moisture used to be. Those little empty pockets are what make the surface look grayish-white and feel like suede.
The second half of the problem is oxidation. Once the ice is gone, air gets direct contact with exposed food tissue. Fats go rancid. Pigments in meat shift color. Vegetables lose their bright green and go dull. This is why freezer-burned food tastes flat, cardboardy, or slightly off even after you trim the worst of it.
It’s Safe to Eat — It Just Won’t Taste Good
This surprises a lot of people. Freezer burn is not spoilage. Bacteria can’t multiply at 0°F, so food that’s been continuously frozen stays safe essentially indefinitely, no matter how ugly it gets. What you lose is quality: texture, moisture, and flavor.
So you have options. Cut the burned sections off and cook the rest. Or use the whole thing in something forgiving — a stew, chili, soup stock, a slow-cooker shred. Freezer-burned chicken breast makes perfectly decent chicken salad. Freezer-burned steak makes a disappointing steak but a fine batch of beef and barley.
The exception: if your freezer actually lost power or shut down and the food thawed above 40°F for more than two hours, that’s a food-safety issue, not a freezer-burn issue. Different problem, different rules. When in doubt after an outage, throw it out.
The Real Culprits Behind Freezer Burn
Packaging That Lets Air In
This is the number one cause by a wide margin. The plastic wrap from the grocery store meat counter is designed to keep a package tidy on a refrigerated shelf for four days. It is not designed for four months at 0°F. Same goes for regular sandwich bags, thin cling film, and the flimsy tubs from the deli case.
Anywhere there’s an air gap between the wrapping and the food surface, moisture will migrate into that gap and freeze there. That’s why you find frost inside the bag and dry patches on the food — those two things are the same water.
Temperature Swings
Every time your freezer temperature rises and falls, ice crystals inside the food partially melt and refreeze. Each cycle makes the crystals bigger and more damaging to cell walls, and each cycle pushes more moisture toward the surface. Fluctuation is the engine that drives freezer burn.
Where do the swings come from?
- Door openings. Standing there with the door open deciding on dinner lets 0°F air fall out and warm, humid Florida air fall in. In August in Land O’ Lakes, that incoming air can be 78°F at 60% indoor humidity. All that moisture condenses and freezes.
- The auto-defrost cycle. Every frost-free freezer deliberately warms its evaporator coils every 8–12 hours to melt off accumulated frost. During that cycle, cabinet temperature can drift up 5–10 degrees. It’s normal and necessary, but it’s also why frost-free freezers cause more freezer burn than old manual-defrost chest freezers.
- Warm food. Sliding a still-warm pot of chili into the freezer raises the temperature of everything near it. Cool food in the refrigerator first, then freeze.
Slow Freezing
Fast freezing makes small ice crystals. Slow freezing makes big ones that rupture cell walls and release moisture. When you overload the freezer with a huge grocery haul all at once, everything freezes slowly, and everything suffers for it. Freeze in batches, and freeze flat when you can — a bag of ground beef pressed to half an inch thick freezes in a fraction of the time a thick lump takes.
Too Full or Too Empty
Both extremes cause problems. A crammed freezer blocks the air vents in the back and along the sides, so cold air can’t circulate and some pockets run warmer than others. A nearly empty freezer has nothing to hold the cold, so temperature crashes every time the door opens.
The sweet spot is roughly 70–85% full with air paths clear. If yours is running empty, fill the gaps with jugs of water — they’ll act as thermal ballast, which is genuinely useful during Florida storm season when a short outage can otherwise take your freezer down fast.
Packaging That Actually Works
Vacuum Sealing
If you freeze a lot of meat, a vacuum sealer is the single best purchase you can make. Pulling the air out removes both the moisture-migration path and the oxygen. Vacuum-sealed beef holds up beautifully for a year or more, where the same cut in a store tray might look rough at three months.
Double Wrapping
No sealer? Two layers work well. Wrap the food tightly in plastic wrap or freezer paper with the food pressed right against it — no air pockets — then slide that into a freezer-grade zip bag and press the air out. The inner layer stops moisture escaping; the outer layer stops it getting anywhere.
Note the word “freezer-grade.” Freezer bags are noticeably thicker than storage bags and much less permeable to water vapor. It’s a real difference, not marketing.
The Water Displacement Trick
This one costs nothing and works almost as well as a vacuum sealer. Put your food in a freezer zip bag, seal it all but the last inch, then slowly lower the bag into a bowl or sink of water. Water pressure squeezes the air out through the opening. When the water reaches the seal line, close it the rest of the way and lift it out. You’ll get a snug, near-airless package every time.
Rigid Containers for Liquids
Soups, stocks, and sauces do best in rigid containers with tight lids. Leave about half an inch of headspace for expansion, and press a piece of plastic wrap directly onto the surface of the liquid before you put the lid on. That contact layer is what stops ice crystals forming on top.
Label everything with contents and date in permanent marker. It sounds fussy. It’s the difference between eating what you froze and finding it in a year.
Set It to 0°F and Leave It There
Zero degrees Fahrenheit is the target. Not “cold.” Not “the dial is on 5.” Actual 0°F, verified.
The dial numbers on most freezers are arbitrary settings, not temperatures, and the built-in digital readout on many models shows the setpoint rather than what the cabinet is really doing. Spend a few dollars on an appliance thermometer, put it in the middle of the freezer between packages, and read it after 24 hours.
- Above 5°F: sublimation speeds up noticeably and storage life drops.
- Below about -5°F: no real quality benefit, and your compressor runs more than it needs to — a meaningful cost in a Florida summer when the kitchen is already warm.
- Swinging more than 3–4 degrees between readings: something’s off. Check the door seal and the vents.
Also check where the appliance lives. A freezer in a hot garage in Hudson or Zephyrhills works far harder than one in an air-conditioned kitchen, cycles more often, and runs warmer than its dial claims. Garage-rated models exist for exactly this reason. And if the coils behind or beneath the unit are packed with dust and pet hair, cooling drops off across the board — our guide on cleaning refrigerator condenser coils covers the twenty-minute version of that job.
Organize for Fast Turnover
Freezer burn is partly a time problem, so anything that gets food eaten sooner helps. A freezer you can actually see into is a freezer you actually use.
- Group by category — meat in one bin, vegetables in another, prepared meals in a third. Cheap plastic bins in an upright freezer are transformative.
- Freeze flat, then file packages upright like books. You can read every label without excavating.
- Practice first in, first out. New packages go behind old ones.
- Keep a running inventory list on the door. Even a scrap of paper cuts door-open time dramatically.
- Do a five-minute audit once a month. Pull anything that’s aging to the front and plan a meal around it.
Realistic Storage Times
These are quality windows, not safety limits. Everything stays safe indefinitely at a steady 0°F. Vacuum sealing roughly doubles these numbers.
- Ground beef, pork, turkey: 3–4 months
- Steaks and roasts: 6–12 months
- Pork chops: 4–6 months
- Whole chicken or turkey: up to 12 months
- Chicken parts: 6–9 months
- Bacon and sausage: 1–2 months (the salt and fat make these fade fast)
- Lean fish (cod, tilapia): 6–8 months
- Fatty fish (salmon, mackerel): 2–3 months
- Shrimp and scallops: 3–6 months
- Blanched vegetables: 8–12 months
- Fruit: 8–12 months
- Soups, stews, casseroles: 2–3 months
- Bread and baked goods: 2–3 months
- Butter: 6–9 months
- Ice cream: 1–2 months, and it’s the first thing to show trouble
Ice cream is worth watching closely. Those gritty ice crystals on top of a half-gallon are the same sublimation-and-refreeze process, just easier to see. If a fresh container turns crunchy within two weeks, your freezer is swinging more than it should.
When Freezer Burn Means Something Is Broken
Here’s the diagnostic angle most articles skip. If you’ve always wrapped food the same way and suddenly everything is burning in a month instead of six, the packaging didn’t change. The appliance did.
A Failing Door Gasket
The rubber seal around the door hardens and shrinks with age, and Florida heat and humidity age it faster than most climates. A gasket that no longer seals lets a slow, continuous stream of warm humid air into the cabinet — which means constant frost buildup, a compressor that runs and runs, and food that dries out fast.
Test it with a dollar bill. Close the door on the bill so half sticks out, then pull. If it slides out with almost no resistance, the seal is weak at that spot. Check every 6–8 inches around all four sides. Also look for condensation or actual ice forming on the outside of the door frame, and listen for a compressor that almost never shuts off. Our post on refrigerator door and seal problems walks through cleaning, realigning, and replacing a gasket.
Defrost System Failure
Frost-free freezers have three parts working together: a defrost heater, a defrost thermostat, and a defrost timer or control board. When one fails, frost stops melting off the evaporator coils and just accumulates. Eventually the coil is a solid block of ice, the evaporator fan can’t push air past it, and the cabinet warms up while the compressor runs nonstop.
Signs to watch for:
- A thick sheet of ice on the back panel inside the freezer
- The freezer stays cold but the fresh-food section above or below gets warm
- Water pooling under the crisper drawers or leaking onto the floor from a clogged defrost drain
- Heavy frost that comes right back within days after you defrost the unit manually
If that sounds like your unit, our breakdown of freezer frost buildup goes deeper on identifying which component failed. And if the box isn’t holding temperature at all, start with the step-by-step guide for a freezer that stops freezing.
Other Hardware Causes
A failed evaporator fan motor means no air circulation — you’ll get one very cold spot near the coils and warm zones everywhere else. A worn door hinge or a sagging door lets the seal sit crooked. A stuck damper between the fresh-food and freezer sections throws the whole balance off. These all produce the same visible symptom: unexplained freezer burn plus frost where it doesn’t belong.
Before you open anything up, unplug the unit. If you’re pulling the back panel inside the freezer to look at the coils, unplug it first, every time. And if you find yourself testing heaters and thermostats with a multimeter and aren’t confident about what you’re reading, that’s the point to stop. The team at SkyBreeze Appliance Repair handles refrigerator and freezer diagnostics across Tampa, Wesley Chapel, Lutz, Dade City, Shady Hills, and The Villages, and a defrost system diagnosis is usually a one-visit job.
A Simple Routine That Keeps It From Coming Back
None of this takes long once it’s habit.
- Rewrap store-packaged meat the day you bring it home. Two minutes each, and it’s the highest-payoff thing on this list.
- Keep an appliance thermometer in the box and glance at it weekly.
- Wipe the door gasket with warm soapy water every couple of months. Crumbs and sticky spots are a leading cause of seals that don’t seal.
- Vacuum the condenser coils twice a year — more often with pets.
- Decide what you want before you open the door.
- Do a monthly inventory sweep and eat the oldest things first.
Do those six things and freezer burn mostly stops being part of your life. If it doesn’t — if the frost keeps coming back, the compressor never rests, or ice cream turns to gravel in a week — the appliance is telling you something, and it’s worth getting a look at it before the whole box quits during a summer heat wave. Give SkyBreeze a call and we’ll figure out which part is actually at fault. While you’re at it, it’s worth reading up on the everyday habits that lead to expensive refrigerator repairs — a lot of them overlap with what causes freezer burn in the first place.