Oven Broiler Not Working? 7 Causes and How to Fix Them
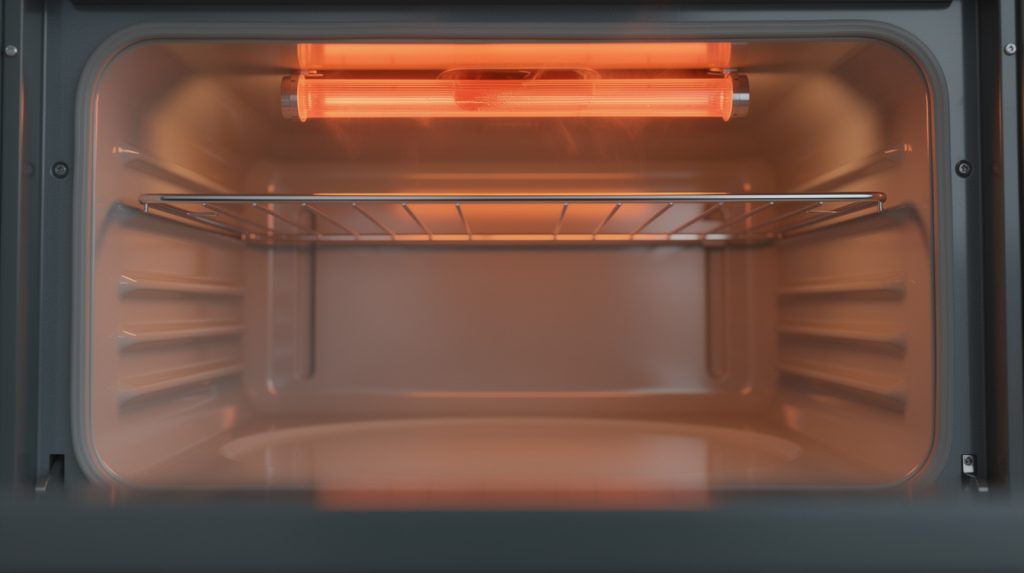
You slide a tray of salmon under the broiler, set the timer for eight minutes, and come back to fish that is pale, wet, and disappointed. The bake element works fine. The oven light comes on. But that top element never glowed orange, or it glowed for thirty seconds and quit. It is one of the more annoying appliance failures because everything else about the oven seems perfectly healthy.
Good news: a dead broiler usually comes down to one of about seven things, and three of them you can check yourself in under twenty minutes with a flashlight and a screwdriver. Everything below is written for electric ovens only. If you have a gas range or a gas wall oven, stop here and call a licensed gas technician. SkyBreeze does not service gas appliances, and nobody should be poking around a gas burner tube or safety valve based on a blog post.
First, Confirm the Broiler Is Actually Broken
Before you take anything apart, rule out the stuff that fools people every single week. A surprising number of “broiler is dead” calls turn out to be a setting, a rack, or a door.
Run this quick test. Empty the oven completely. Set it to Broil on High. Close the door to the broil position (more on that below) and watch the top element through the window for a full three minutes. A healthy broil element goes from dark gray to dull red in about 30 to 45 seconds and reaches bright orange by the two-minute mark. It should stay bright, not pulse on and off every few seconds like a bake element does.
What you see in those three minutes tells you a lot:
- Nothing at all, no glow, no heat — you are looking at an element, a connection, a fuse, or the control board.
- Glows in patches, one bright section and one dark section — the element is failing internally. Replace it.
- Glows, then shuts off after a minute or two — usually a thermostat, sensor, or thermal-limit issue, not the element.
- Glows fine but food does not brown — that is a rack position and pan problem, not a broken oven.
Also check whether your oven throws an error code when you select Broil. Codes like F1, F3, F30, or F10 point straight at the control board or sensor circuit. Our appliance error code cheat sheet covers the common ones by brand and saves a lot of guessing.
Cause 1: The Broil Element Is Burned Out or Blistered
This is the number one cause, and it is also the easiest to spot. The broil element is the heavy metal loop mounted to the roof of the oven cavity. Because it runs at roughly 3,000 to 3,600 watts and sits directly above dripping fat, it takes more abuse than any other part in the oven.
What a failed element looks like
Pull up a flashlight and get your head down at rack level so you can see the top surface of the element, not just the bottom. You are looking for:
- A blister or bubble in the metal sheath, often the size of a pea, usually surrounded by a scorched halo
- A visible break, split, or a section where the tube has separated
- White or gray powdery residue at one spot, which is the insulating magnesium oxide that has escaped
- Sagging or warping in one section compared to the rest of the loop
Any of those means the element is done. They do not get better, and they cannot be patched. A blistered element can also arc and pop with a bright flash the next time it fires, which is startling but rarely dangerous inside a closed oven cavity.
What causes it
Grease is the usual culprit. When fat lands on a 1,500-degree surface it carbonizes, and that carbon crust holds heat against the sheath until it fails. This is exactly why we push people toward gentle, regular oven cleaning rather than one heroic scrub a year. If you would rather not use caustic sprays, the approach in our guide to deep cleaning an oven without chemicals works well and does not leave residue that bakes onto the element.
Cause 2: Loose or Corroded Element Terminals
If the element looks perfect but never glows, the connection behind it is the next suspect. The two element leads pass through the back wall of the oven and attach to spade terminals on wires coming from the control. Heat cycling makes those connections expand and contract thousands of times, and eventually one of them loosens just enough to arc.
Arcing burns the terminal. Burned terminals mean more resistance, which means more heat, which means more burning. Left alone long enough, the wire insulation chars back an inch or two and the connector turns black and crumbly.
How to check it safely
Kill power first. Not the control panel, not the oven’s off button. Go to the breaker panel and shut off the double-pole breaker feeding the range or wall oven, then confirm the oven is completely dead before touching anything. Electric ovens run on 240 volts, and that circuit does not forgive shortcuts.
With power off, remove the two screws or nuts holding the broil element bracket to the oven ceiling. Ease the element forward two or three inches. The wires behind it are usually long enough to allow that. Now inspect:
- Terminals should be shiny silver, tight on the spade, and free of black scorching
- Wire insulation should be intact, not brittle or flaked back from the crimp
- The porcelain wire nut or ceramic insulator, if present, should not be cracked
A single loose spade you can push back on is a five-minute fix. Burned terminals and charred wire are a different story. That repair requires cutting back the damaged wire and splicing in a high-temperature terminal kit rated for oven use, and if the wire is charred deep into the harness the whole rear harness may need replacing. That is a stop-and-call-a-pro moment.
Cause 3: A Blown Thermal Fuse
Most electric ovens have a thermal fuse or thermal limiter, a small one-time safety device that opens permanently when the cavity or the component compartment overheats. On some models it kills the whole oven. On others it takes out only the broil circuit, which is why the bake element can still work perfectly while broil is stone dead.
Thermal fuses almost never fail for no reason. The two most common triggers are a self-clean cycle that ran too hot and a blocked cooling vent. If your broiler quit right after you ran self-clean, this is very likely your answer. We wrote about that whole chain of events in our piece on oven self-clean cycle problems, and it is worth a read before you run that cycle again.
Testing a thermal fuse
With the breaker off and the fuse disconnected from at least one lead, set a multimeter to continuity. A good fuse reads near zero ohms and beeps. A blown fuse reads OL or infinite with no beep. There is no in-between and no resetting it. Blown means replace.
Important: replacing the fuse without finding out why it blew just buys you another few weeks. If a cooling fan is not running, a vent is packed with grease, or the control is holding an element on too long, the new fuse will go the same way.
Cause 4: A Failed Control Board or Broil Relay
Every modern electric oven switches its elements through relays. On most designs those relays live on the electronic range control board behind the front panel. Relay contacts are mechanical, they carry serious current, and after ten or fifteen years of clicking they wear out or weld.
Signs pointing at the board or its broil relay:
- Bake works flawlessly, broil does absolutely nothing, and both element and fuse test good
- You hear no click from behind the control panel when you press Broil and Start
- The display behaves oddly, resets itself, or drops segments
- An element stays on when it should be off, which is the welded-relay version and genuinely a safety issue
Before you condemn a board, try a hard reset. Shut the breaker off for a full five minutes, then back on. That clears latched fault states on a lot of Whirlpool, GE, and Frigidaire controls. Our guide on how to reset any appliance walks through the right sequence by brand.
If the reset does not bring the broiler back and everything else tests good, board replacement is the likely fix. This is where a service call earns its money, because control boards run a few hundred dollars and diagnosing by parts-swap gets expensive fast. The team at SkyBreeze Appliance Repair can meter the relay output at the element terminals and tell you in one visit whether the board is actually the problem, which beats ordering a part and hoping.
Cause 5: A Faulty Oven Temperature Sensor
The oven temperature sensor is a thin probe, usually stainless, poking into the upper rear corner of the cavity. It is a resistance thermometer, and the control reads it constantly to decide when to fire an element.
Here is why a bad sensor can look like a dead broiler. If the sensor drifts high and reports 500 degrees when the cavity is really at 200, the control thinks the oven is already blazing and refuses to energize the broil element at all. You get a couple of seconds of glow, then nothing, and the oven sits there cold while the display claims it is preheated.
Checking the sensor
Most sensors are RTD-style and read close to 1,080 to 1,100 ohms at room temperature. With the breaker off, unplug the sensor connector at the back of the oven and measure across the two pins. A reading well outside that range, or an open circuit, means replacement. Also wiggle the connector: heat-damaged sensor plugs are common, and a green or crusty pin is as good as a failed sensor.
A drifting sensor often shows up in baking too, as scorched cookie bottoms or cakes that never set. If your oven has also been running hot or cold lately, cross-check with our walkthrough on calibrating oven temperature before you replace anything, since a calibration offset can mimic sensor drift.
Cause 6: The Door Is Not Closed Right, or the Latch Is Stuck
Two separate door problems can kill a broiler, and both are common enough that we check them before pulling any panels.
The self-clean latch stuck in the locked position
If you ran self-clean and the motorized latch never fully retracted, the control still believes the door is locked. In lock mode most ovens block broil entirely. You may see a Lock or Door icon on the display, or the latch arm may be visibly halfway across. Cutting power at the breaker for five minutes often lets the latch motor re-home on the next power-up. If it does not, the latch motor or its switch has failed and needs replacing.
The door not sealing, or the wrong door position
Older ovens, and most drawer broilers, expect the door to be left open a few inches while broiling so the thermostat does not shut the element down. Newer ovens want the door fully closed. Check your model, because doing it the opposite way genuinely stops the element from staying on.
A door that will not close flush is its own problem. Warped hinges, a compressed gasket, or a bent liner all let heat escape and confuse the control. Our article on fixing an oven door that will not close covers hinge adjustment and gasket replacement. In humid Florida kitchens we also see a lot of gaskets that have gone gummy and sticky from grease plus year-round humidity, and a gummy gasket will hold the door open a hair without you noticing.
Cause 7: Rack Position and Pan Mistakes That Fake a Broiler Failure
Sometimes the appliance is fine and the technique is off. Broiling is radiant cooking, and radiant heat falls off fast with distance. Three inches versus six inches under the element is not a small difference, it is roughly a four-fold difference in intensity at the food surface.
The usual mistakes:
- Rack too low. For searing and browning, food should sit 3 to 4 inches below the element. Most people leave the rack in the middle position out of habit.
- Solid sheet pan instead of a slotted broiler pan. A solid pan pools grease, the food steams in its own juices, and nothing browns. Use the two-piece broiler pan with the slotted top.
- Cold, wet food straight from the fridge. Pat it dry. Surface moisture has to evaporate before browning starts, and that eats your whole broil window.
- Foil covering the slots. Blocking the drip slots turns a broiler pan back into a steamer.
- Overcrowding. Leave an inch between pieces so radiant heat reaches the sides.
If the element glows bright orange and food still will not brown, the fix is on this list, not inside the oven.
Drawer Broilers Versus Top Broilers
Not all broilers live in the main cavity. Plenty of freestanding electric ranges, especially older ones, put the broiler in a pull-out drawer below the oven with its own element in the drawer ceiling.
Drawer broilers have their own quirks. There is usually no thermostat control at all, just full-power on or off, so a drawer broiler either works or it does not. The element is more exposed to spills, the wiring runs through a tighter, hotter space, and the drawer glides get gunked with grease until the drawer no longer closes fully, which on some models means a switch never makes contact. If your drawer broiler is dead, pull the drawer all the way out, clean the glides, and check that nothing is blocking full travel before you go further.
Storage drawers and broiler drawers look identical from the front. If there is no element visible in the drawer ceiling, it is a storage drawer and it was never meant to cook anything.
The Safe Way to Run a Continuity Test
If you are comfortable with a multimeter, a continuity test on the broil element takes two minutes and removes all the guesswork.
- Step one. Turn off the double-pole breaker for the oven at the panel. For a plug-in range, unplug it. Verify the oven is fully dead.
- Step two. Remove the two mounting screws on the broil element bracket and pull the element forward a few inches.
- Step three. Disconnect both wires from the element terminals. You must isolate it, or you will read the rest of the circuit instead.
- Step four. Set the meter to ohms and touch one probe to each terminal.
- Step five. Read it. A good broil element measures roughly 15 to 40 ohms depending on wattage. OL or infinite means the element is open and needs replacing.
- Step six. Check for a short to ground. Put one probe on a terminal and the other on the element’s metal bracket or the oven wall. Any continuity there means the element is grounded and must be replaced immediately, because that is what trips breakers and burns terminals.
Reinstall in reverse, push the spade connectors on until they seat with a small snap, and make sure no wire touches the element sheath.
When to Stop and Call a Pro
Plenty of this is homeowner-friendly. Some of it is not. Put the screwdriver down and call someone if you run into any of the following:
- You smell burning plastic or see charred, brittle wiring behind the element
- The breaker trips whenever you select Broil
- An element stays energized after you turn the oven off
- The self-clean latch is jammed and will not release after a five-minute power cycle
- You have replaced a thermal fuse and it blew again
- You are not fully confident you can isolate the 240-volt circuit
- It is a gas oven of any kind, in which case call a licensed gas technician
If you are in Tampa, Wesley Chapel, Lutz, Land O’ Lakes, Zephyrhills, Dade City, Hudson, Shady Hills, or The Villages, SkyBreeze Appliance Repair handles electric oven and range diagnostics, and we carry common broil elements, sensors, and thermal fuses on the truck so most of these turn into same-visit repairs.
Is It Worth Fixing?
Almost always, yes. A broil element is one of the cheapest parts in the appliance and one of the fastest to swap. A sensor is similar. Even a thermal fuse plus the labor to trace why it blew is far less than a new range.
The math shifts when the failure is a control board on an oven that is already past twelve or thirteen years old, especially if the door hinges are sagging and the cavity enamel is chipping. At that point you are looking at a board price that can be half the cost of a mid-range replacement. Our repair versus replace cost guide lays out the thresholds by appliance type and age if you are on the fence.
One last habit worth building. Wipe the oven ceiling and the top of the broil element every few months, once the oven is fully cool. Thirty seconds with a damp cloth removes the grease film that eventually cooks into a blister. It is the single highest-return maintenance move for a broiler, and it costs you nothing.