Dryer Won’t Start? A Step-by-Step Troubleshooting Guide
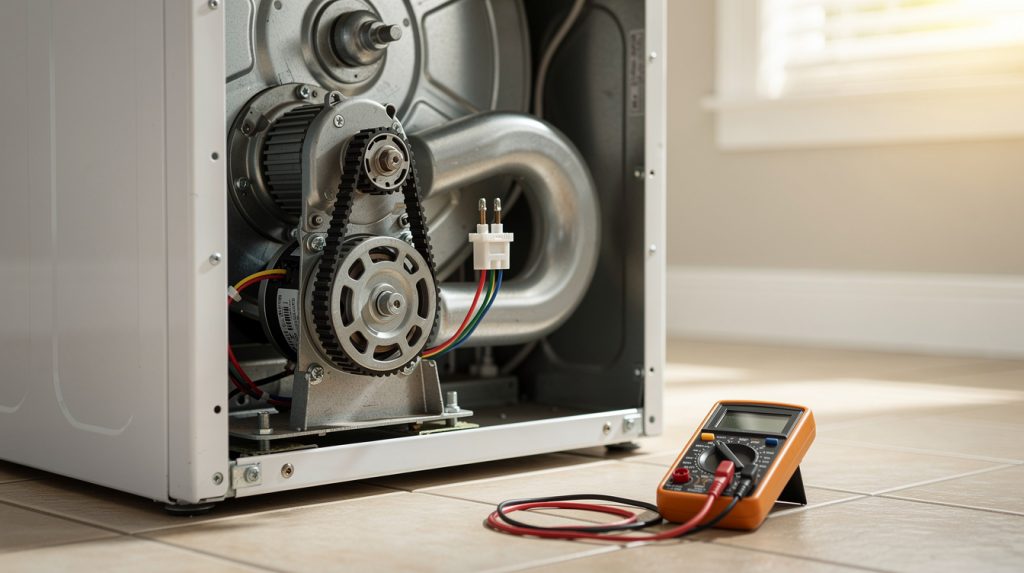
You load the drum, close the door, press Start, and nothing happens. No tumble, no hum, maybe not even a light on the panel. A dryer that won’t start is one of the most common calls we get across Tampa, Wesley Chapel, and Land O’ Lakes, and the good news is that most of the causes are cheap, simple, and easy to narrow down with a little patience.
This guide walks through the same order of checks a technician uses, starting with the things that cost nothing and working toward the parts that take a meter and a screwdriver. It covers electric dryers only. If you have a gas dryer, the ignition and gas valve side of things needs a licensed gas technician, though the electrical checks in the first half still apply to the motor and controls.
One rule before anything else: unplug the dryer or shut off its breaker before you remove a single screw. An electric dryer runs on 240 volts, and that is enough to cause serious injury. Testing a part with a multimeter is safe when the machine is disconnected; poking around a live terminal block is not.
First, Figure Out Which Kind of “Won’t Start” You Have
Before you touch anything, pay attention to exactly what the dryer does when you press Start. The symptom tells you where to look, and it saves a lot of time.
- Totally dead. No lights, no beeps, no display. This almost always points to power: the breaker, the cord, the terminal block, or occasionally a failed control board or thermal fuse on models that route power through it.
- Lights on, but nothing happens when you press Start. The dryer has power but a safety or start circuit is open. Think door switch, start switch, thermal fuse, or belt switch.
- Dryer hums but won’t start. The motor is getting power but cannot turn. That usually means a seized motor, a jammed blower wheel, a stuck drum, or a failed centrifugal switch inside the motor.
- Starts, then stops within a few seconds. The motor spins up, but the centrifugal switch never closes to hold the circuit, or the belt switch opens because the belt is broken. If the dryer runs for minutes before quitting, that is a different problem, and we cover it in our guide to a dryer that shuts off mid-cycle.
Keep your symptom in mind as you read. The power checks below are worth doing regardless because they take about two minutes.
Step 1: Check the 240V Breaker (Including the Half-Tripped Trap)
An electric dryer runs on a double-pole breaker, which is two breaker handles joined by a bar or a single wide handle marked 30 amps. Each half feeds one 120-volt leg, and the dryer needs both legs to run the heating element. The motor and controls, however, typically run on just one leg.
That creates a confusing situation we see all the time in older homes around Zephyrhills and Dade City: one leg trips, the other stays live, and the dryer either turns on but never heats, or shows partial life on the panel and refuses to start. The breaker handle may look perfectly normal. A tripped breaker often sits in a middle position that is easy to miss, especially on a panel in a dim garage.
Here is how to check it properly:
- Find the dryer breaker in your panel. It is usually labeled, but not always.
- Push the handle firmly all the way to OFF, then back to ON. Do not just nudge it. A half-tripped breaker will not reset unless you go fully off first.
- If the dryer shares a panel with a well pump or a pool pump, check that the neighbors are not tripped too. A weak or overheated breaker can affect the ones next to it.
- If the breaker trips again immediately, stop. Something downstream has a short, and forcing it on repeatedly is a fire risk. Our article on why a dryer keeps tripping the breaker explains what to look for.
A breaker that has tripped many times over the years weakens, and Florida’s afternoon storms can push a tired one over the edge. If it keeps tripping with no fault in the dryer, the breaker itself may be failing, which is an electrician job.
Step 2: Inspect the Power Cord and Terminal Block
If the breaker is fine and the dryer is still dead, the next stop is where the cord meets the machine. Unplug the dryer, pull it away from the wall, and remove the small access cover on the back where the cord enters. Behind it is the terminal block: three or four screw terminals that the cord’s ring connectors bolt onto.
What a technician looks for here:
- Burned or discolored terminals. A loose connection arcs, heats up, and eventually melts the plastic block or burns through the ring terminal. You will often smell it before you see it. If the terminal block is damaged, the whole block gets replaced, usually $15 to $40 for the part.
- Loose screws. Dryers vibrate, and over ten or fifteen years, terminal screws back out. A loose neutral is a classic cause of a dryer that works some days and not others.
- Cracked or frayed cord. Cords get crushed behind the machine when it is shoved against the wall. If the outer jacket is split or you see bare copper, replace the cord. A new three-prong or four-prong cord is around $20 to $35.
- The plug and outlet. Look at the prongs for pitting or scorch marks, and look inside the outlet slots for the same. In coastal areas like Hudson and Shady Hills, salt air corrodes contacts faster than you would expect.
If you are comfortable with a multimeter, check for 240 volts across the two hot slots of the outlet. If you get 120 on one side and nothing on the other, you are back to a half-tripped breaker or a bad connection at the panel. If a live outlet test makes you nervous, skip it. Everything else on this list can be checked with the power off.
Step 3: Test the Door Switch
Every dryer has a small switch that closes when the door latches. If it does not close, the dryer assumes the door is open and refuses to start. On many models, the drum light still works and the panel lights up, which is why “lights on, won’t start” so often turns out to be a door switch.
Quick checks:
- Open the door and find the little plunger or lever near the latch. Press it by hand. On most dryers you should hear a faint click. If it feels mushy, stuck, or does nothing, the switch is suspect.
- Look at the door catch itself. A worn or broken catch may not push the door far enough in to trip the switch. This is common on dryers that get slammed shut a few thousand times.
- With the dryer unplugged, pull the switch and test it with a multimeter set to continuity. Pressed in, it should read closed. Released, open.
Door switches cost $10 to $30 and are one of the easiest dryer repairs there is. On most top-panel machines, you lift the top, unclip the switch, and swap it in about fifteen minutes.
Step 4: Check the Start Switch or Push-to-Start Relay
The start switch is the button or knob you press to begin the cycle. It is a momentary switch: it completes the circuit just long enough for the motor to spin up, and then the motor’s own centrifugal switch takes over and keeps the circuit closed. If the start switch fails, nothing happens when you press it, even though the panel looks normal.
On older mechanical-timer dryers, the start switch is a simple contact behind the knob. Pull the knob, remove the switch, and test for continuity while pressing it. On newer electronic models, the start function runs through a relay on the control board, covered below. A telltale sign of a worn switch: you have to hold the button for a few seconds, or press it several times, before the dryer catches. A replacement runs $15 to $40.
Step 5: The Thermal Fuse (And Why It Really Blew)
This is the single most common part behind a dryer that has power but will not start. The thermal fuse is a small, one-time safety device mounted on the blower housing or exhaust duct inside the dryer. If the air in the exhaust gets too hot, the fuse opens permanently and cuts power to the motor, or on some models to the entire dryer.
To test it, unplug the dryer, remove the back or lower front panel depending on the model, find the fuse (usually a small white or black rectangle with two wires), and check it for continuity. If there is no continuity, it is blown.
Here is the part people skip. A thermal fuse does not blow on its own. It blew because the dryer overheated, and the reason it overheated is almost always restricted airflow: a lint-packed vent, a crushed flex duct behind the machine, a bird nest at the outside hood, or a lint screen housing full of fuzz. If you replace the fuse ($8 to $20) without fixing the vent, it will blow again within a few weeks, and you will have been running a dryer at fire-risk temperatures in the meantime.
So when you replace the thermal fuse:
- Disconnect the vent from the back of the dryer and look inside. If you see a lint carpet, clean the entire run to the outside wall.
- Check the exterior vent flap. In Florida, lizards and wasps love these, and a stuck flap is a common airflow killer.
- Replace foil or plastic flex duct with rigid or semi-rigid metal. Flex duct sags, traps lint, and kinks when the dryer gets pushed back.
- Check whether the dryer also has a high-limit thermostat or cycling thermostat that failed, since a stuck thermostat can cause the overheating in the first place. Our dryer not heating guide shows where these live.
If loads had been taking longer and longer before the dryer quit, that was the vent warning you. Our Florida-specific guide to how often you should clean your dryer vent explains why our humidity makes lint clump faster than in drier climates.
Step 6: The Drive Motor and Centrifugal Switch
If your dryer hums but won’t start, or starts and dies after a couple of seconds, the motor is where to look. Two things can go wrong here.
A seized or struggling motor
The hum you hear is the motor windings energized but unable to turn the shaft. Before condemning the motor, rule out the easy stuff. Unplug the dryer, remove the front or top panel, and try to turn the drum by hand. It should turn with moderate resistance. If it is locked solid, something is jamming it: a sock wrapped around the blower wheel, a coin or bra wire wedged between the drum and the bulkhead, or a seized drum roller. We cover those in detail in our guide to a dryer drum that will not turn.
Also spin the blower wheel by hand. If it is packed with lint or grinding against the housing, the motor cannot get up to speed. If the drum and blower move freely and the motor still just hums, its start winding or bearings have failed. A replacement drive motor is $80 to $180 for the part, and the job involves removing the drum and belt.
The centrifugal switch
Inside the motor is a centrifugal switch. When the motor reaches speed, spinning weights fling outward and flip this switch, which does two things: it drops the start winding out of the circuit, and it closes the contacts that keep power flowing to the motor (and, on most models, to the heating element) after you let go of the start button.
When the centrifugal switch is dirty or worn, you get the classic “starts, then stops” symptom: you press Start, the drum turns, you let go, and it coasts to a stop. Or the dryer runs but never heats, because the heater contacts never close. On some motors the switch is a separate $20 to $50 part; on others it is integrated and the whole motor gets replaced.
Step 7: The Belt Switch
Many dryers, especially Whirlpool, Maytag, and Kenmore designs, have a belt switch (sometimes called a broken-belt switch) mounted near the idler pulley. Its job is to shut the motor off if the drive belt snaps, so the motor does not spin uselessly for an hour. The idler arm holds the switch closed as long as the belt is under tension.
This gives you two possible failures:
- The belt broke. The idler arm drops, the switch opens, and the dryer either will not start at all or starts and immediately stops. You may have heard a snap or noticed the drum stopped turning while the motor was still running on the last load. A belt is $10 to $25, and replacing it is a common DIY job on the right model.
- The switch itself failed. The belt is fine, but the switch has worn out or the idler arm is not pushing it far enough. Test it with a multimeter with the idler arm held in its normal position.
Not every dryer has a belt switch, so do not go hunting for one if your model’s diagram does not show it.
Step 8: The Control Board
On modern electronic dryers, the main control board decides whether to send power to the motor relay. If the board is dead, you get a totally dead dryer even with good power at the terminal block. If the board’s motor relay has failed, you get lights, beeps, and a Start button that does nothing.
Before assuming the board is bad, try a proper reset. Unplug the dryer for a full five minutes, not thirty seconds, then plug it back in. Many boards store a fault state that only clears with a real power cycle. Our appliance reset guide covers the model-specific button sequences too.
If the board is truly the problem, you may see signs like a partially lit display, buttons that respond intermittently, or a burned smell near the console. Boards are the most expensive part on this list, typically $120 to $300 plus labor, and this is where a lot of homeowners hit the repair-or-replace decision. On a dryer under eight years old, a board is usually worth doing. On a fifteen-year-old machine with a squeaky drum and a tired motor, it may not be.
One Florida-specific note: control boards are surprisingly often killed by power surges. If your dryer went dead right after a storm or an outage, the board is a prime suspect. A surge protector rated for a 240-volt appliance circuit is cheap insurance, and we have more on that in our guide to protecting appliances during Florida storm season.
DIY or Call a Pro?
Plenty of this is reasonable homeowner territory. Resetting the breaker, inspecting the cord and terminals, cleaning the vent, and swapping a door switch or thermal fuse are all jobs that need a screwdriver, a nut driver, and a $15 multimeter. With the dryer unplugged, the risk is low.
Where it makes sense to call someone:
- The breaker trips repeatedly, or you find melted or scorched wiring anywhere. Do not keep resetting it.
- You are not comfortable testing a live 240-volt outlet, and the dryer is still dead after the basic checks.
- The diagnosis points to the drive motor or control board. Both are pricey parts, and a wrong guess is an expensive mistake. A technician confirms with a meter before ordering anything.
- The dryer is stacked, in a tight closet, or you simply do not want to wrestle a drum out.
If you are in Tampa, Wesley Chapel, Lutz, or up toward The Villages and you would rather have someone confirm the fault and bring the right part on the first trip, SkyBreeze Appliance Repair handles electric dryer repair across the whole area. Most no-start calls are diagnosed and fixed in a single visit.
Habits That Keep Your Dryer Starting
Most no-start dryers we see did not fail out of the blue. They gave warnings for weeks. A few habits prevent the majority of these repairs:
- Clean the lint screen every load, and wash it with dish soap every month or two. Dryer sheet residue builds an invisible film that chokes airflow.
- Clean the vent run at least once a year, more if you have a long run or a big family. This is the single best way to protect the thermal fuse and the heating element.
- Do not shove the dryer hard against the wall. It crushes the duct and strains the cord.
- Pay attention to drying time. If loads that used to take 45 minutes now take 70, the vent is restricting and the fuse is living on borrowed time. Our article on why a dryer takes forever to dry walks through the causes.
- Empty pockets. Coins, pens, and screws end up in the blower housing and jam the motor.
- Use a surge protector on the dryer circuit if your neighborhood loses power often during summer storms.
A dryer is a simple machine at heart: a motor, a belt, a heater, a fan, and a handful of safety switches. When it will not start, one of those switches is usually doing exactly what it was designed to do. Find the switch, find out why it opened, and you fix both the symptom and the cause. And if you want a second set of hands, SkyBreeze Appliance Repair is a phone call away.