Coming Back to Florida? The Snowbird’s Appliance Reopening Checklist
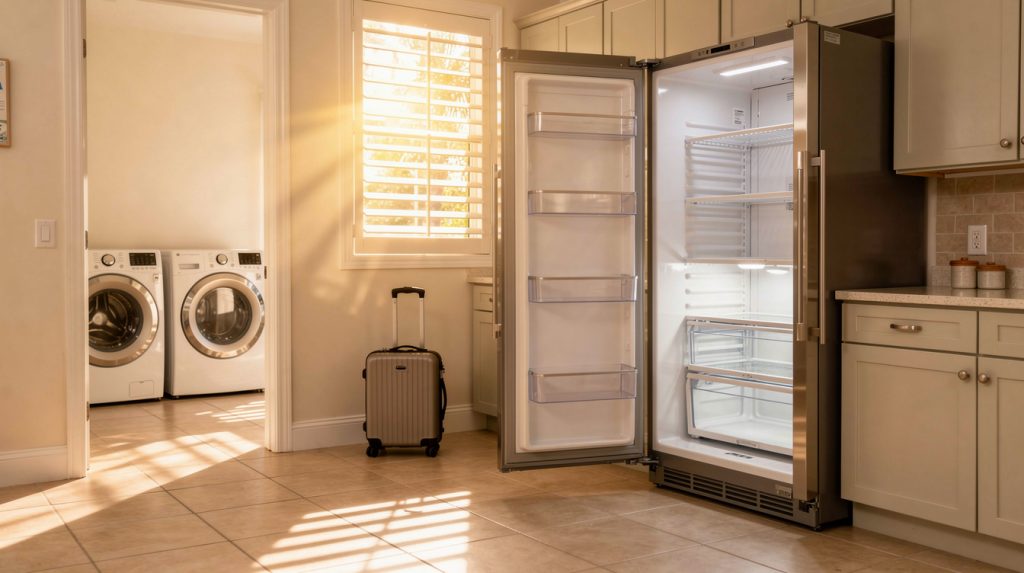
Every fall, somewhere between Labor Day and Thanksgiving, the golf carts come out of storage in The Villages, the RV parks in Zephyrhills fill back up, and the phones at appliance repair shops across Pasco and Sumter counties start ringing. The calls all sound about the same: “We just got back from Michigan and the fridge smells terrible,” or “The dishwasher ran for two minutes and now there’s water under the sink.”
A house that sits closed up through a Florida summer is not the same house you left in April. Five or six months of heat, humidity, afternoon thunderstorms, and power flickers do real work on rubber seals, pump housings, and water lines. Appliances are a lot like people that way. They do better with a little exercise.
The good news is that most of the trouble is predictable, and a methodical first week back will catch nearly all of it before it turns into a repair bill. Work through this checklist appliance by appliance, and please, before you open up anything, unplug it or switch off the breaker.
Before You Touch a Single Appliance
Take twenty minutes to do a lap of the house before flipping switches.
Check the breaker panel
Look for any breakers sitting in the middle “tripped” position or fully off. A tripped breaker on the refrigerator circuit is the most common reason a snowbird comes home to a warm fridge and a science experiment in the freezer. Note which circuit it was before you reset it. A breaker that trips again within a few minutes is telling you something is wrong on that circuit, and you should leave it off until it’s looked at.
Look at the surge protector
Most whole-house surge protectors have a status light. Green means it’s still doing its job; red, amber, or no light usually means it sacrificed itself during a lightning strike over the summer and needs replacing. The same goes for plug-in surge strips behind the washer. Florida storms are brutal on control boards, and our guide on protecting appliances during storm season walks through what actually helps.
Water heater and main water valve
If you shut off the main water supply before you left, leave it off for now. You’ll open it after you’ve inspected the hoses on the washer, dishwasher, and refrigerator. If you turned the water heater down to “vacation,” bring it back up to around 120 degrees. If the hot tap smells like rotten eggs once the tank has heated, bacteria got a foothold in the lukewarm water; run it for a few minutes and it usually clears.
Refrigerator and Freezer: The Big One
Your refrigerator either ran the whole time you were away or sat unplugged with the doors propped open. Each scenario has its own checks.
If you left it running
Open the freezer first. Ice cubes melted into a single block, or frost crept up the back wall, mean the unit lost power at some point and refroze. Toss anything you wouldn’t stake your stomach on. Then check the fresh food side with a thermometer. It should read between 35 and 38 degrees. If it’s warmer, give it a few hours with the doors closed before you decide anything is wrong. If it never gets there, our article on a refrigerator that runs but won’t cool covers what tends to fail.
Pull the fridge out a few inches and vacuum the condenser coils, too. Six months of dust forces the compressor to work harder.
If you left it off with the doors open
Smart move. Before plugging it in, wipe the interior with warm water and a couple of tablespoons of baking soda. Then inspect the door gaskets. Soft rubber seals are where mold loves to grow in a humid, closed-up house. Pull the folds apart gently and clean them with diluted vinegar. If the gasket has stiffened, cracked, or no longer holds a dollar bill snugly when you close the door on it, replace it. A leaking gasket is one of the sneakiest causes of a fridge that runs constantly, and we cover the fix in our guide on refrigerator doors that won’t seal.
Once it’s clean and dry, plug it in and let it run empty overnight before loading food. That lets you spot problems before your groceries pay for them.
Ice maker and water filter
The water in your fridge’s supply line and filter has been stagnant for months. Replace the filter, dump the first two or three bins of ice, and run the dispenser until it’s clear and cold. If the ice maker was left on with the water shut off, it may have gone into a fault state; a simple reset usually brings it back.
The first-24-hours check
Before bed the first night, freeze a cup of water and set a coin on top. In the morning, if the coin has sunk into the ice, the freezer lost power overnight and you have an electrical issue or a failing compressor to chase down. Listen for the compressor cycling normally, and check behind the unit for puddles from a defrost drain line that dried out and cracked.
Washing Machine: Don’t Just Turn the Valves On
We see more water damage from returning residents’ washers than from any other appliance. Rubber supply hoses that spent a summer in a hot, closed laundry room get brittle, and the first time full pressure hits them, they can let go.
Inspect before you pressurize
- Pull the washer forward and look at both supply hoses. Bulges, cracks, or crusty white mineral deposits at the fittings mean replace them. Braided stainless hoses run about $20 to $30 a pair.
- Check the drain hose for kinks and make sure it’s seated in the standpipe.
- Look at the floor and wall behind the washer for water stains or soft drywall.
- Only now open the supply valves, slowly, and watch the fittings for a full minute.
If you find a leak once the machine is running, our rundown of eight places a washing machine leaks from will help you narrow it down.
Dried-out seals and stagnant water
Front-load washers have a rubber door boot that holds a little water in its folds. Left closed for six months in Hudson or Land O’ Lakes humidity, that water turns into a black mold colony. Pull the boot back and wipe it with diluted bleach. Top-loaders are less prone to it but can still get a swampy smell from the outer tub.
Run an empty cycle on the hottest setting with a cup of white vinegar or a washer cleaner, then a second empty rinse. Stay nearby during that first cycle and listen. A pump that sat dry may whine at first and then settle. A drum bearing that has rusted will grind or roar on spin, and that’s a repair call.
Dryer: Check the Vent Before Anything Else
A dryer vent is a warm, dark, sheltered tunnel with a flap on the end. To a mouse, a palmetto bug, or a nesting bird, that’s real estate. We have pulled bird nests, wasp nests, and one very unhappy rat out of dryer vents in Dade City and Shady Hills. A blocked vent doesn’t just make the dryer slow; it’s the number one cause of dryer fires.
Inspect outside and in
- Outside, find the vent hood. Make sure the flap opens freely and nothing is packed behind it. Shine a flashlight in.
- Inside, pull the dryer forward and disconnect the transition duct. Look for lint, moisture, and any evidence of critters.
- Clean the lint screen and vacuum the housing it slides into.
- Reconnect with foil tape, not screws, which catch lint.
If it’s been more than a year since the whole run was cleaned, this is the time. Our dryer vent cleaning guide for Florida homeowners explains why our humidity makes lint pack tighter than it does up north.
Run a test load
Once the vent is clear, run the dryer empty on air fluff for five minutes, then on heat with a couple of damp towels. Stay in the laundry room. You’re listening for squeals (a dry idler pulley or drum roller), thumps (a belt or a flat spot on a roller), and smelling for anything burnt. A faint dusty smell for the first minute is normal after a long idle. Anything stronger deserves a look at our article on what a burning smell from a dryer means. If it runs but never gets warm, a heating element or thermal fuse likely gave up over the summer.
Dishwasher: The Quiet Leak Risk
Dishwashers keep a little water in the sump at the bottom of the tub on purpose. It keeps the pump seal wet so it doesn’t dry out and crack. When a dishwasher sits unused for months in a hot house, that water evaporates, the seal dries, and the first time the pump spins, it can leak. Sometimes the seal reseats after a cycle or two; sometimes it doesn’t.
Before the first cycle
- Open the door and look in the tub. If there’s a foul smell or visible mold, wipe it down and clean the filter at the bottom (twist it out on most modern units).
- Open the cabinet under the sink and inspect the supply line and the drain hose connection at the disposal or drain tee. Look for corrosion at the fittings.
- Turn on the supply valve under the sink slowly and watch for drips.
Run it empty with a cleaner
Put a cup of white vinegar in a bowl on the top rack, or use a dishwasher cleaning tablet, and run the hottest cycle empty. About ten minutes in, open the cabinet under the sink and feel the cabinet floor. Check again at the end of the cycle. If you find water, stop and figure out where it’s coming from before running it again. Our guide to a dishwasher leaking from the bottom covers the pump seal, door gasket, and float switch, the three most common sources after a long idle.
If the dishwasher starts but the water never heats, or it stops mid-cycle, a heating element or control board may have taken a hit during a summer storm. A lingering smell usually clears with a second run.
Oven and Range: Look Before You Heat
One quick note first: this section covers electric ovens and cooktops. If yours is gas, have a licensed gas technician check the connection and pilot before you use it.
An oven that has sat closed and cool for six months is a cozy hideout for roaches, ants, and the occasional lizard. Before you turn anything on, pull out the racks and look in the corners, behind the bake element, and in the drawer underneath. Vacuum out any droppings or debris and wipe the interior with a damp cloth. Do not spray oven cleaner on the elements.
Inspect the elements
With the breaker off, look at the bake element on the floor and the broil element at the top for blisters, breaks, or spots that look scorched or corroded. Florida humidity can cause pinhole corrosion on older elements, and one that looks fine can still fail on first use, sometimes with a small spark and pop. That’s startling but not dangerous in a modern oven. Elements typically run $30 to $70 for the part.
Run a burn-off
Turn the breaker back on, open a window, and run the oven at 400 degrees for 20 to 30 minutes empty. Watch the elements glow evenly from end to end; a section that stays dark is on its way out. A faint dusty smell is normal. Sharp electrical smells, buzzing, or a flickering display point to a control board or relay that didn’t survive the summer power flickers, and our guide on an oven that won’t turn on can help you narrow it down. Test each cooktop burner the same way, one at a time.
Garbage Disposal: The One Everyone Forgets
Disposals have a seal around the grinding chamber and a bearing that both want to stay wet. Leave one dry for a summer and it will often hum and refuse to turn on the first try. The rubber splash guard can stiffen and crack, and whatever was in the chamber when you left has had months to ferment.
Jam check with the hex key
With the power switch off, find the hex socket in the center of the disposal’s underside. Insert a quarter-inch hex key and work it back and forth until the flywheel spins freely through a full rotation. If it won’t budge, don’t force it, and never reach into the chamber. Our article on a disposal that hums but won’t spin walks through the reset button and what to do next.
Deodorize and test
Run cold water, flip it on, and let it run for 30 seconds. Then grind a handful of ice cubes and coarse salt to knock loose anything stuck to the chamber walls, followed by a few citrus peels. Check underneath for drips at the sink flange, the dishwasher inlet, and the discharge elbow, since dried seals leak from all three. If it’s dripping from the bottom of the housing itself, that’s the internal seal and the unit is usually done.
Your First Week Back: A Simple Schedule
Trying to do all of this on day one is a recipe for missing something. Spread it out.
- Day 1: Breaker panel, surge protector, water heater. Clean and start the refrigerator. Inspect washer hoses and dishwasher lines before opening the main water valve.
- Day 2: Coin test in the freezer. Replace the water filter and flush the ice. Empty hot cycle in the washer. Dryer vent inspection and test load.
- Day 3: Dishwasher cleaning cycle with a leak check under the sink. Disposal jam check, run, and deodorize.
- Day 4: Oven inspection and burn-off. Test each cooktop burner.
- Days 5 through 7: Use everything normally and pay attention. Odd noises, long cycles, and small puddles tend to show up on the second or third use, not the first.
DIY or Call a Pro?
Almost everything on this list is safe for a homeowner: cleaning, inspecting, replacing hoses and filters, running empty cycles, and freeing a jammed disposal. But there are a few situations where it’s smarter to stop and make a call.
- A breaker that trips again after reset, or any burnt smell from an outlet or the panel.
- A refrigerator that runs 24 hours and still can’t get below 40 degrees. That’s usually a compressor, start relay, or sealed system issue, and none of those are DIY.
- A washer or dishwasher leaking from underneath, where the pump and seals live.
- A dryer that runs but never heats, or trips the breaker.
- Oven elements that spark, or a range display that’s dead or flickering after a storm.
- A disposal leaking from the bottom of the housing.
If you’re weighing whether an older unit is worth fixing, our repair vs. replace cost guide lays out the math. And if the fridge is the one giving you trouble, SkyBreeze Appliance Repair handles refrigerator repair across The Villages, Wesley Chapel, Zephyrhills, and the surrounding area, and we’re used to the fall rush from returning residents. Same goes for washing machine repair, which is where most of the water-damage calls come from this time of year.
Habits That Make Next Fall Easier
- Run every appliance at least once a week while you’re here. Seals stay supple, pumps stay primed.
- Have the dryer vent cleaned once a year, ideally right before you leave.
- Keep a note in the kitchen drawer listing what you did before you left (water off, fridge on or off, water heater setting).
- Ask a neighbor or property watcher to check the breaker panel and run the water for a minute every couple of weeks over the summer.
A Quick Word About Leaving Next Spring
The reopening checklist gets a lot easier if the closing checklist is done right. Before you head north, shut off the main water supply and the valves to the washer, dishwasher, and fridge. Either leave the refrigerator running with a neighbor checking on it, or empty it, unplug it, clean it, and prop both doors open. Run the disposal and dishwasher one last time and leave the dishwasher door cracked. Clean the lint screen. Set the water heater to vacation mode, unplug anything with a control board you don’t need, and leave the AC around 80 degrees with a humidistat running so the gaskets don’t grow a fur coat while you’re away. Do those things, and the fall checklist turns into a pleasant afternoon instead of a week of surprises.
Related Articles
- Florida Storm Season: How to Protect Your Appliances and Food During Power Outages
- How Often Should You Clean Your Dryer Vent? A Florida Homeowner’s Guide
- Refrigerator Door Won’t Close or Seal? 8 Causes and Easy Fixes
- Garbage Disposal Humming But Not Spinning? Here’s the 10-Minute Fix
- How to Prevent Washing Machine Flooding: Essential Safety Tips