How to Clean Refrigerator Condenser Coils (And Why It Matters)
Here’s a refrigerator maintenance task that most homeowners have never done — and probably don’t even know exists. Cleaning your refrigerator’s condenser coils is one of the most impactful things you can do for your appliance’s efficiency and lifespan, and it takes about 15 minutes. Yet it’s estimated that the majority of homeowners never clean their condenser coils at all.
In Florida’s warm climate — whether you’re in Tampa, Wesley Chapel, Lutz, or The Villages — refrigerators work harder than they do in cooler parts of the country. That makes regular maintenance even more important here than in northern states. Dirty condenser coils are a leading cause of refrigerators running warm, compressors burning out prematurely, and energy bills creeping upward for no apparent reason.
What Are Condenser Coils and What Do They Do?
The refrigerator’s cooling system works by cycling refrigerant through a closed loop. The refrigerant absorbs heat from inside the refrigerator, then releases that heat outside the appliance through the condenser coils. Think of the coils as the refrigerator’s radiator — they’re responsible for dumping excess heat into the surrounding air so the interior stays cold.
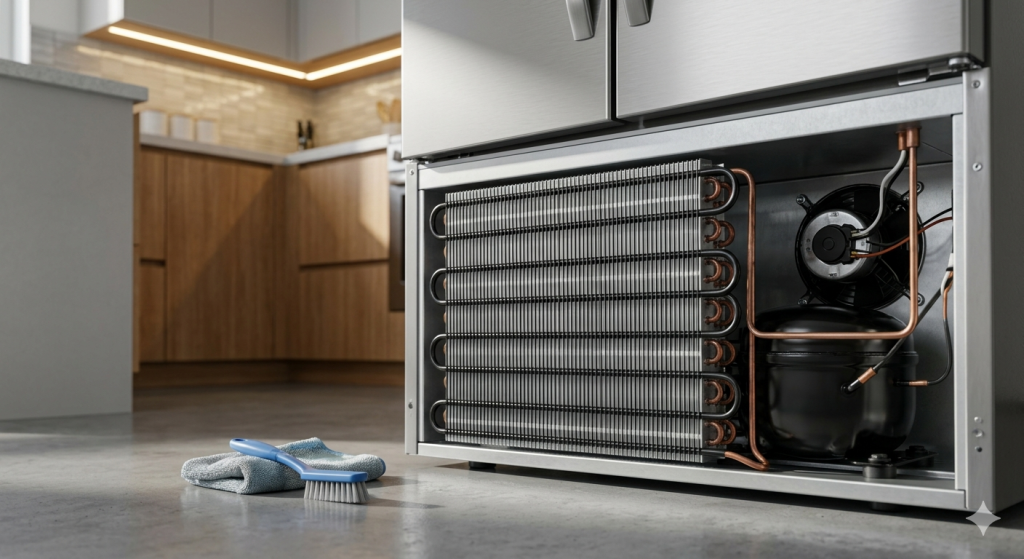
The condenser coils are located either underneath the refrigerator (accessed from the front via a kick plate) or on the back of the unit. They look like a grid or series of parallel tubes, often with thin metal fins. A small fan called the condenser fan helps blow air over the coils to dissipate heat more efficiently.
Why Dirty Coils Are a Problem
Over time, the condenser coils become coated with dust, pet hair, lint, and other debris. This layer of buildup acts as insulation, trapping heat against the coils and preventing efficient heat transfer. When that happens:
- The compressor has to run longer and harder to maintain the set temperature
- The refrigerator uses more electricity, raising your energy bills
- The compressor — the most expensive component in a refrigerator — wears out faster
- The interior may run warmer than it should
- In severe cases, the refrigerator can fail to cool at all
Studies by appliance manufacturers suggest that heavily soiled condenser coils can increase energy consumption by 30% or more. For a refrigerator that runs 24/7, that’s a meaningful impact on your monthly utility bill.
In Florida’s climate, where kitchens get warm and dust and pet dander accumulate quickly, condenser coils can get dirty faster than in other regions. We recommend cleaning them every 6 months — and quarterly if you have pets with heavy shedding.
What You’ll Need
- A vacuum cleaner with a brush attachment or crevice tool
- A condenser coil cleaning brush (also called a refrigerator coil brush — available at hardware stores for about $10)
- A flashlight
- A screwdriver (some models require removing a panel)
How to Clean the Condenser Coils: Step-by-Step
Step 1: Unplug the Refrigerator
Safety first. Pull the refrigerator away from the wall slightly and unplug it from the outlet. You don’t need to fully empty the refrigerator — the temperature inside will stay cold enough for 30–60 minutes without power.
Step 2: Locate the Coils
On older refrigerators and many newer top-mount and bottom-mount models, the condenser coils are at the back of the unit — you’ll see them immediately when you pull the fridge away from the wall. They look like a metal grid.
On many newer models (especially French door and side-by-side refrigerators), the coils are located underneath the unit, accessed through a grille at the bottom front. You’ll need to remove the grille (it usually snaps or slides off) to access the coils.
Step 3: Brush the Coils
Using the condenser coil brush, gently work through the coils in a back-and-forth motion to loosen dust and debris. Pay attention to the spaces between the coils, where debris tends to pack in thickest. Work from top to bottom so debris falls toward the floor.
Step 4: Vacuum the Loose Debris
Use the vacuum with a brush attachment to remove all the loosened dust and debris. Vacuum the coils themselves, the condenser fan (if accessible), and the surrounding area. Getting as much debris as possible out of the coil area ensures maximum airflow.
Step 5: Clean the Condenser Fan Blades
While you’re in there, wipe down the condenser fan blades with a dry cloth or brush. A dirty fan has to work harder to move air, and it adds to the efficiency problem created by dirty coils.
Step 6: Reinstall and Plug In
Replace any access panels or grilles, push the refrigerator back into position, and plug it back in. Listen for the compressor to start and confirm the refrigerator is cooling normally over the next few hours.
How to Know If the Coils Were Very Dirty
After cleaning the coils on a refrigerator that’s never been serviced, many homeowners notice:
- The refrigerator runs more quietly — the compressor cycles less frequently
- The sides and back of the refrigerator feel cooler to the touch
- The refrigerator reaches and maintains temperature more consistently
- Energy usage may visibly drop on your utility bill over the next billing cycle
Related Maintenance to Do at the Same Time
Since you already have the refrigerator pulled out, it’s a great time to:
- Clean behind and underneath the fridge (food and debris accumulate there)
- Check the door gaskets for cracks, tears, or areas that aren’t sealing properly
- Inspect the water line connection if you have an ice maker or water dispenser
- Wipe down the condenser fan blades and motor housing
While you’re reviewing your refrigerator’s health, it’s also worth reading about common refrigerator mistakes that shorten appliance life — and our guide on how long appliances last if you’re wondering whether your refrigerator has more good years left in it.
What Happens If You Never Clean the Coils?
Homeowners who never clean the condenser coils typically experience one of two outcomes. In the better scenario, the refrigerator gradually becomes less efficient and uses more electricity over years of use — often without the homeowner noticing. In the worse scenario, the compressor overheats and fails. Compressor replacement is expensive — often $300–$600 in parts and labor — and on older refrigerators it often makes more financial sense to replace the appliance entirely.
If you’re currently dealing with a refrigerator that’s running but not cooling, dirty condenser coils are one of the first things to check before calling for service. Sometimes a thorough coil cleaning is all it takes to restore normal operation.
Professional Maintenance Visits
If you’re not comfortable doing this yourself, or if you want a more comprehensive maintenance check, the team at SkyBreeze Appliance Repair offers appliance maintenance visits throughout Tampa, Wesley Chapel, Lutz, Shady Hills, Hudson, Dade City, Zephyrhills, and The Villages.
A maintenance visit includes condenser coil cleaning, door seal inspection, temperature calibration check, and a full assessment of the refrigerator’s condition. It’s a great way to catch small problems before they become expensive ones — and to make sure your refrigerator is running as efficiently as possible in Florida’s heat.
How to Tell If Your Coils Are Dirty Without Pulling the Fridge Out
If you haven’t cleaned your condenser coils in a while, here are some signs that they may be significantly dirty, even before you pull the fridge out to check:
- The refrigerator feels warm or hot on the sides or back. A refrigerator with heavily soiled coils can’t dissipate heat effectively, so the heat has nowhere to go — it radiates back into the cabinet and can be felt on the exterior surfaces.
- The compressor runs constantly or for very long cycles. If you notice the refrigerator’s motor running more or longer than it used to, the compressor is working overtime to compensate for poor heat rejection.
- Your electricity bill has crept up without explanation. This is hard to attribute to one appliance, but a significant increase in usage over months often points to an appliance working harder than it should.
- The refrigerator is running warmer than it used to. If the set temperature is the same but the interior feels slightly warmer than it did a year ago, reduced cooling efficiency from dirty coils is a likely cause.
Different Coil Configurations in Different Refrigerators
Not all refrigerators position their condenser coils in the same place. Understanding where yours are located helps you service them more effectively:
Bottom-Mount Coils (Most Common Modern Design)
The majority of refrigerators built in the past 15–20 years have condenser coils located underneath the unit, behind the front kick plate. You remove the grille at the base front of the refrigerator to access them. These coils have a condenser fan that pulls air from the front through the coils and exhausts it out the back or sides. They accumulate dust, lint, and pet hair quickly because they’re at floor level.
Rear-Mount Coils (Older Refrigerators)
Refrigerators made before roughly 2000 typically had exposed coils at the back of the unit — you can see them immediately when you pull the fridge away from the wall. These coils are actually self-cleaning in a sense (they don’t have a fan and rely on natural convection), but they still accumulate dust that reduces their effectiveness. Clean them with a vacuum and soft brush annually.
Coils Inside the Walls (Some No-Frost Models)
Some modern refrigerators use condenser coils embedded in the walls of the cabinet — these are sealed systems that don’t require cleaning. If you have this type and can’t find any accessible coils, check your owner’s manual. The absence of accessible coils on these models is intentional.
Seasonal Considerations in Florida
Florida’s climate makes condenser coil maintenance more important than in most other states. Here’s why:
Outdoor temperatures in the Tampa Bay area regularly exceed 90°F in summer. Even with air conditioning running, kitchen temperatures are typically warmer than in cooler climates — and the refrigerator’s cooling efficiency is directly tied to the temperature differential between the condenser coils and the surrounding air. The warmer the room, the harder the coils have to work.
We also have high humidity, which contributes to faster buildup of dust and debris on coils. Pet owners in Florida often notice their coils need cleaning more frequently than the every-6-month guideline. If you have multiple pets and a warm kitchen, cleaning the coils quarterly is a reasonable approach.
Additionally, citrus and other fine particulate from Florida’s agricultural environment can accumulate on coils in homes near open windows. It doesn’t take long for a layer of fine debris to develop a measurable impact on efficiency.
After Cleaning: Monitoring Your Refrigerator’s Performance
After cleaning the condenser coils for the first time in several years, take note of these changes over the next week:
- Does the compressor run less frequently?
- Is the back or side of the refrigerator cooler to the touch?
- Is the interior temperature more consistent?
- Has the refrigerator become noticeably quieter?
If you cleaned heavily soiled coils and don’t notice any improvement in the refrigerator’s operation, there may be an additional issue — perhaps a refrigerant leak, a failing compressor, or a damaged fan motor. At that point, scheduling a diagnostic visit is worthwhile. Our team at SkyBreeze Appliance Repair can quickly determine whether the issue is a maintenance problem or a mechanical one.
Quick Summary
Cleaning your refrigerator’s condenser coils takes about 15 minutes, requires only basic tools, and can meaningfully extend your appliance’s life while reducing energy consumption. In Florida’s climate, aim to clean the coils every 6 months — more often if you have pets. It’s one of the best maintenance investments you can make for an appliance that works around the clock, every day of the year.
Related Articles
- The Secret to Keeping Your Refrigerator Running Like New
- Refrigerator Running But Not Cooling?
- Common Refrigerator Mistakes That Lead to Costly Repairs
- Refrigerator Leaking Water? Here’s Why
- How Long Do Appliances Last? A Lifespan Guide