Washing Machine Leaking Water? 8 Places to Check Before You Panic
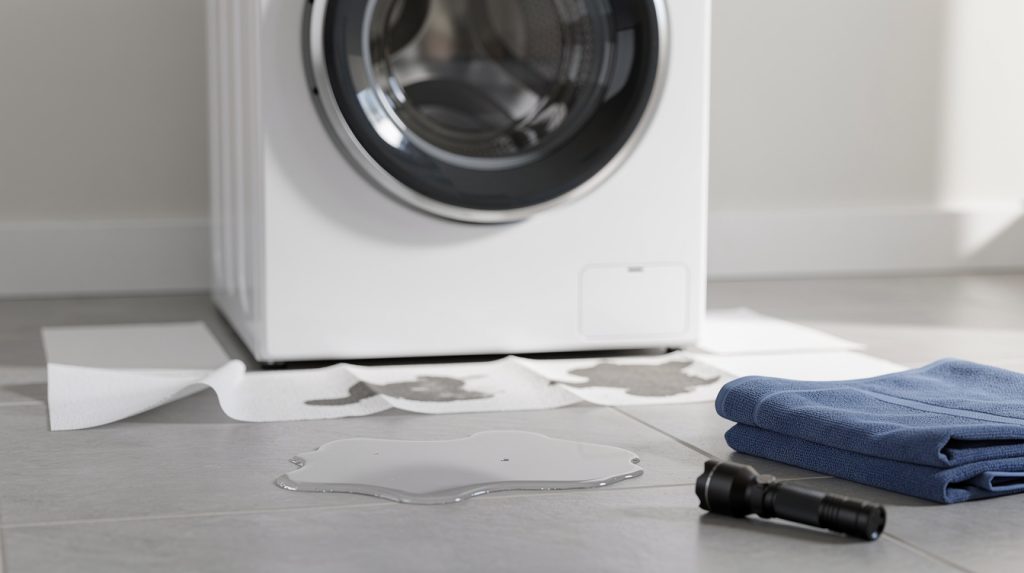
You walk into the laundry room in bare feet and there it is: a cold puddle spreading across the tile. Maybe it’s a thin sheen you can barely see. Maybe it’s ankle-deep and creeping toward the hallway carpet. Either way, your first instinct is to assume the worst and start pricing out new washers. Hold off on that. In our experience across Tampa, Wesley Chapel, and Land O’ Lakes, the large majority of washer leaks come down to a $12 hose clamp, a torn rubber boot, a clogged filter, or somebody using way too much detergent. Real tub failures are the exception, not the rule.
The trick is figuring out where the water is coming from before you start replacing parts. Water travels. It runs along the frame, drips off the lowest corner, and lands three feet from where the actual failure is. So we’re going to walk through eight places leaks come from, in the order a tech would check them, plus a simple paper-towel method that pinpoints the source in about 20 minutes. Grab a flashlight and some old towels.
First: Shut It Down Safely
Before anything else, unplug the washer from the wall. Not “turn it off at the control panel” — physically pull the cord. Then reach behind the machine and close both water supply valves, the hot and the cold. If your valves are stiff and haven’t been turned in years (common in older Zephyrhills and Dade City homes), turn them gently. Cranking a corroded valve can snap the stem and turn a small leak into a flooded room.
Mop up every drop of standing water. You need a bone-dry floor to run the diagnostic below, and standing water on tile is a genuine fall hazard. If water has reached a wall outlet, a floor outlet, or the base of a nearby appliance, stop and call an electrician before you go any further.
The Trace-the-Leak Method
This is the single most useful thing in this article, and almost nobody does it. Techs use it because guessing wastes parts and time.
Step 1: Dry everything completely
Floor, machine cabinet, hoses, the wall behind it. Towel-dry the entire footprint plus two feet in every direction. Any moisture left over will confuse the results.
Step 2: Lay paper towels like a grid
Put a single layer of white paper towels under and around the machine — front, both sides, and as far under the back as you can reach. White matters. It shows rust color, detergent residue, and gray drain water differently than clean supply water, and that tells you a lot. If you can slide a few sheets directly under the pump area, do it.
Step 3: Run a short cycle and watch each stage
Plug the washer back in, open the water valves, and start the shortest cycle your machine has — usually Quick Wash or Rinse & Spin. Now do not walk away. Kneel down with your flashlight and watch through each stage:
- Fill (first 2–4 minutes). Water appearing now points to the inlet hoses, the valve where they connect, or the inlet valve body itself. Supply-side leaks are clean, clear water.
- Wash / agitate. Leaks that start once the drum is full and moving usually mean the door boot on a front loader, the tub-to-pump hose, or a crack in the outer tub.
- Drain. Water that only shows up when the pump kicks on means drain hose, hose clamp, standpipe backup, or the pump housing and filter.
- Spin. Leaks that only appear at high RPM point to the tub seal, a loose boot clamp, or an out-of-balance load flexing something loose.
Note the exact stage and the exact towel that got wet first. That one data point cuts your suspect list from eight down to two.
Front, Back, or Underneath?
Location is your second clue. Combine it with timing and you’re usually looking straight at the culprit.
Water at the front
On a front loader, front leaks are the door boot roughly 70% of the time. On a top loader, water at the front usually means it ran down the inside of the cabinet from somewhere higher, or the detergent dispenser overflowed with suds.
Water at the back
Back leaks are almost always plumbing: inlet hose connections, the drain hose where it meets the standpipe, or the standpipe itself backing up. Good news — these are the cheapest and most DIY-friendly of the bunch.
Water underneath, center
Water pooling under the middle of the machine with dry hoses behind it is the one that concerns us. That’s pump, pump seal, tub-to-pump hose, or outer tub territory.
Cause 1: A Torn or Dirty Door Boot
The door boot (also called the bellows or gasket) is the big flexible rubber donut sealing the door on a front loader. It lives a hard life. Bra underwires, bobby pins, coins, and keys work into the folds and slowly slice it. Once there’s even a pinhole tear on the lower half, you’ll see water at the front of the machine during wash and spin.
Peel the boot back with your fingers and run them all the way around the inside fold. You’ll probably pull out a surprising amount of lint, hair, and hardware. Look for cracks, splits, and thin worn patches, especially at the 5, 6, and 7 o’clock positions where water sits. Also check that the outer retaining spring clamp is seated in its groove all the way around — a clamp that has popped out of position leaks without any tear at all.
Cleaning the boot is DIY. Replacing one is a two-hour job involving two spring clamps, a stretched rubber part that fights you the whole way, and sometimes removing the front panel and door lock. Most people are happier having a tech do it. While you’re in there, that same trapped gunk is what causes the musty smell people ask us about constantly — our guide on getting rid of washing machine odor covers the cleaning routine that keeps it from coming back.
Cause 2: Drain Hose Clamp and Standpipe Backup
Follow the corrugated drain hose from the back of the washer to where it enters the standpipe in the wall. Two things go wrong here.
First, the clamp where the hose attaches to the washer’s pump can loosen or corrode. Squeeze it, wiggle the hose, look for crusty white mineral deposits — a telltale sign of a slow drip that’s been happening for months. Tightening or replacing a spring clamp is a five-minute fix.
Second, and far more common, the standpipe backs up. Your washer dumps 15 to 20 gallons in under 90 seconds. If the drain line is partially clogged with lint and detergent scum, water rises up the standpipe and overflows around the hose. The dead giveaway: water shows up only during drain, only at the back, and it’s gray and sudsy rather than clear. That’s a plumbing clog, not a washer problem. Also make sure the drain hose is inserted only about 6 to 8 inches into the standpipe. Shove it too far and you create a siphon that pulls water out of the tub mid-cycle. If your machine is struggling to empty at all, the causes overlap heavily with what we cover in washing machine won’t drain.
Cause 3: Inlet Hose Failure and Hose Age
These are the two rubber or braided-steel hoses running from the wall valves to the back of the machine. They are also the number one cause of catastrophic laundry room floods, because unlike every other leak on this list, they’re under household pressure 24 hours a day, whether the washer is running or not.
Feel along each hose for bulges, soft spots, or hairline cracks near the fittings. Check the rubber washers inside the couplings — they flatten and harden over time. Snug the connections by hand plus a quarter turn with pliers. Do not gorilla it; overtightening cracks the plastic inlet valve ports.
Here’s the Florida part. Our water is hard, and in well-served parts of Pasco and Hernando counties it’s harder still, loaded with calcium and iron. Mineral scale builds up inside hose fittings and around the inlet screens, creating pressure points and slow weeps. Combine that with attic and garage laundry rooms that hit 95 degrees for months, and rubber ages faster here than up north. Our rule: replace washer inlet hoses every 5 years, no exceptions, and go with braided stainless steel. A pair costs about $25. If you’ve been fighting scale on multiple appliances, the fuller picture is in our write-up on Florida hard water appliance damage.
Write the install date on the hose with a Sharpie. Future you will be grateful.
Cause 4: Drain Pump Seal and Filter Housing
The drain pump sits low, usually front-left or front-right behind an access panel. Most front loaders and many newer top loaders have a small coin trap or debris filter there with a threaded cap.
Two failure modes. The filter cap gets cross-threaded or its O-ring dries out after a cleaning, and then it weeps every drain cycle. Or the pump’s own shaft seal fails, which shows up as a steady drip directly beneath the pump body during drain and spin.
Before opening any filter cap, put down a shallow baking pan and towels. There’s a quart or more of water sitting in there and it will find your socks. Clean the filter, inspect the O-ring for flattening or cracks, and reseat the cap by hand only — never with tools. If the housing itself is cracked or the drip comes from the pump body rather than the cap, that’s a replacement part and a job for a tech.
Cause 5: The Tub-to-Pump Hose
This thick corrugated hose runs from the bottom of the outer tub to the drain pump, and it’s the classic hidden leak. It sags in a low spot where socks, coins, and hair clips collect, and over time the constant flexing during spin wears the rubber thin. It also has clamps at both ends that loosen.
Symptom pattern: water appears under the center of the machine during wash and spin, hoses in back are dry, boot looks fine. You’ll need to remove the front or rear panel to see it. Squeeze along the length looking for soft spots, and check both clamps. This one is generally a pro repair, since reaching it often means tipping or partially disassembling the machine.
Cause 6: Too Much Detergent (Yes, Really)
We get called out for leaks that turn out to be oversudsing more often than you’d think. Excess suds climb up past the tub, out the dispenser, and over the top of the boot seal. The water on your floor is real, but nothing is broken.
The signs are unmistakable once you know them: the puddle is foamy or leaves a filmy residue when it dries, there’s white crust around the dispenser drawer, and clothes come out feeling slick or stiff. High-efficiency machines use a fraction of the water older washers did, so the detergent dose is much smaller than the bottle cap suggests.
- Use only HE detergent in an HE machine, and use two tablespoons for a normal load, not a full cap.
- Skip the fabric softener or cut it in half. It’s a major residue contributor.
- Run a tub-clean cycle with white vinegar or a washer cleaning tablet monthly, which matters more here because hard water keeps detergent from rinsing away cleanly.
- Cut the dose further if you have a water softener.
If suds are your issue, you just saved yourself a service call. If you’ve ruled it out and the machine is still leaking, or you’re seeing more than one warning sign at once, SkyBreeze Appliance Repair handles washer diagnostics across Tampa, Lutz, Hudson, Shady Hills, and The Villages, and we’d rather find a $30 clamp than sell you a repair you don’t need.
Cause 7: A Cracked Outer Tub
The outer tub is the plastic vessel holding the water; the stainless drum spins inside it. Cracks happen from years of unbalanced loads hammering the suspension, or from a foreign object getting wedged between drum and tub.
You’ll see water under the center during fill and wash, sometimes only above a certain water level. Often there’s a history of loud banging during spin beforehand — the same symptom set we describe in our post on a washing machine shaking and vibrating. A cracked outer tub is a major repair, and on a machine over eight years old the honest answer is usually replacement. Our repair vs. replace cost guide lays out the math.
Cause 8: A Worn Tub Shaft Seal
Where the drum shaft passes through the back of the outer tub, a seal and bearing keep water in. When that seal wears, water seeps onto the bearing, rusts it, and leaks down the back of the machine.
Two warning signs give it away early: a rising metallic roar during spin that gets louder as RPMs climb, and rust-colored water streaking the back of the cabinet or staining your paper towels orange. That rust color is the tell — clean supply water never looks like that. Catch it early and a seal-and-bearing job is worth doing on a newer machine. Ignore it and the bearing eventually seizes and takes the drum with it.
DIY or Call a Pro?
Reasonable to handle yourself: tightening or replacing inlet hoses, tightening a drain hose clamp, repositioning the drain hose in the standpipe, cleaning the door boot, cleaning the pump filter, leveling the machine, and fixing a detergent overdose.
Call a tech: door boot replacement, drain pump or pump housing, tub-to-pump hose, inlet valve assembly, tub seal and bearings, and anything involving a cracked outer tub. Also call if water reached an outlet, if you smell burning, or if the leak returns after you thought you fixed it.
Habits That Prevent the Next Leak
- Close the supply valves when you leave town for more than a few days, especially during storm season. Pressure surges after an outage have burst plenty of hoses.
- Replace inlet hoses every 5 years. Braided stainless, dated with a marker.
- Level the machine. A washer that rocks under load stresses every seal and hose it has. All four feet should be firm against the floor with no wobble.
- Empty pockets and use mesh bags for bras and small items. Underwires are the boot’s worst enemy.
- Clean the pump filter every 3 months. Two minutes, and it prevents both leaks and drain failures.
- Wipe the boot dry and leave the door ajar after the last load. In Florida humidity, a closed front-loader door is a mold farm.
- Consider a drain pan or a leak sensor if the laundry room sits over finished flooring. A $20 water alarm has saved more than one hardwood floor.
Most washer leaks are small, findable, and cheap to fix once you know which stage of the cycle produces them. Run the paper-towel test, note the stage and the spot, and you’ll be miles ahead of guessing. And when the trail leads somewhere that means pulling the front panel off, that’s a fine time to hand it over — SkyBreeze Appliance Repair is a phone call away, and we’ll get the floor dry and stay that way. For a broader look at what else to watch for, our list of signs your washing machine needs repair is a good next read.