How Often Should You Clean Your Dryer Vent? A Florida Homeowner’s Guide
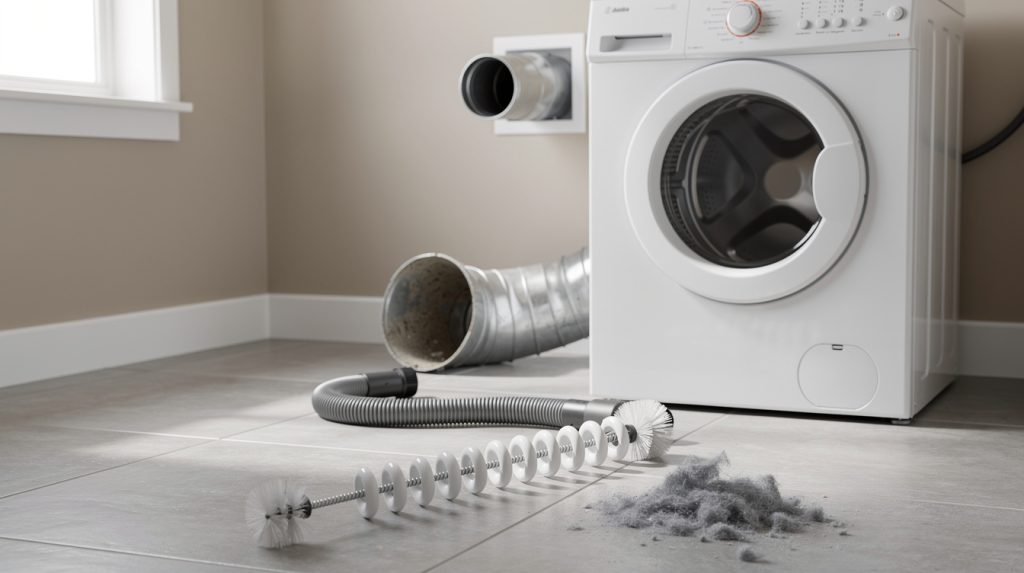
Almost every homeowner cleans the lint screen. Almost nobody cleans the duct behind the dryer. That gap is where the trouble lives, and in Florida it shows up faster than it does up north, because the air you’re pushing through that duct is already carrying a lot of moisture before it ever meets a wet towel.
Here’s the short version so you have it up front: most Tampa-area households should have the full vent path cleaned once a year. Big families, long duct runs, and homes with pets need it every six to eight months. And if you already have symptoms — long dry times, a hot laundry room, a musty smell — the clock doesn’t matter, you’re overdue right now. Below is how to tell where you land, how to do the job yourself with about $40 of tools, and where the line is between a Saturday project and a call to a tech.
One important note before anything else: gas dryers
Everything in this guide applies to electric dryers only. If you have a gas dryer, the vent is doing double duty — it’s carrying combustion byproducts, including carbon monoxide, out of your house. Disconnecting, moving, or reconnecting a gas dryer is not a DIY job, and a partially blocked gas dryer vent is a carbon monoxide problem, not just a lint problem. Call a licensed gas technician for that work. SkyBreeze doesn’t service gas appliances, and we’d rather tell you that plainly than have you guess.
The four parts people confuse (and why it matters)
When someone says “I clean my dryer vent every load,” they usually mean the lint screen. That’s one of four separate things, and the other three are where blockages actually build. Knowing the difference makes the rest of this guide make sense.
1. The lint screen (lint filter)
The mesh screen you pull out of the door opening or the top of the machine. This catches maybe 60 to 80 percent of lint. Clean it every single load. Once a month, wash it under hot water with a drop of dish soap and a soft brush — fabric softener and dryer sheets leave an invisible waxy film on the mesh that chokes airflow. Quick test: run water over the screen. If it beads up and sits there instead of pouring straight through, it needs a scrub.
2. The lint screen housing (the slot the screen sits in)
This is the vertical cavity the screen slides into, and it’s the most-ignored spot in the whole system. Lint that slips past the edges of the screen packs into the bottom of that slot and turns into a felt mat. You need a narrow vacuum crevice tool or a flexible lint-trap brush — the skinny one that looks like a giant pipe cleaner, about 24 inches long. Most people who do this for the first time are genuinely startled by what comes out.
3. The duct run
The pipe from the back of the dryer to the outside wall. Could be four feet through a garage wall or thirty feet through an attic. This is the part that causes fires and the part almost nobody touches without being told to.
4. The exterior hood (vent flap)
The louvered or flapper cover on the outside of your house. Lint collects right behind the flap because that’s where warm moist air hits cooler outside air and drops its load. It’s also the part most likely to be blocked by something alive, which we’ll get to.
How often, realistically, for your house
Manufacturers say “annually” and leave it there. That’s fine as a default, but it ignores the two variables that actually drive buildup: how many loads you run, and how long and twisty the duct is.
Use this as a starting point for the full job — housing, duct, and exterior hood:
- 1–2 people, 2–4 loads a week, short straight duct under 10 feet: every 12–18 months.
- 3–4 people, 5–8 loads a week: every 12 months.
- 5+ people, or 8+ loads a week: every 6–8 months.
- Any household with shedding pets: knock 3–4 months off whatever your number is. Pet hair binds lint into dense clumps that don’t blow through.
- Duct run over 20 feet, or with three or more elbows: every 6–9 months regardless of household size. Each 90-degree elbow adds roughly the equivalent of 5 extra feet of resistance.
- Roof-terminated vent, or laundry on a second floor: every 6–12 months, and usually worth hiring out.
- Anyone who washes a lot of towels, bedding, or fleece: shorten the interval. Those fabrics shed heavily.
Check the exterior hood far more often than you clean the duct — once a month, thirty seconds. Run the dryer, walk outside, put your hand near the flap. You should feel a strong, warm push of air, not a lazy trickle.
Why Florida makes this worse
Air holds moisture, and it can only hold so much. When your dryer exhaust is already humid on the way in — because your laundry room is humid, because everything here is humid from June through October — it can’t absorb water from your clothes as efficiently. The result is longer cycles, more tumbling, and more lint generated per load. More running time means more lint per month going into the same duct.
The second Florida problem is that the lint doesn’t stay fluffy. In a dry climate, lint in a duct is loose and blows around. Here, warm humid exhaust hitting a duct that runs through an unconditioned garage or a shaded exterior wall condenses on the inside surface, and damp lint sticks and compacts. What you pull out of a Tampa or Land O’ Lakes duct is often a dense grey felt, not a cloud. That packed layer is what turns a slow airflow problem into a heat problem.
Third, if your laundry room is in a garage — extremely common around Wesley Chapel and Lutz — you’re pulling in hot, damp garage air as the dryer’s intake. That’s a rough starting point for any drying cycle, and it’s part of why a dryer that takes too long to dry is one of the most common calls we get down here.
Warning signs you’re already overdue
Your dryer will tell you before anything dramatic happens. Watch for:
- Cycles creeping longer. A normal load of mixed cottons should be dry in 35 to 50 minutes. If you’re at 70, 80, or running two cycles, airflow is the first suspect.
- Clothes hot to the touch but still damp. Classic restricted-airflow signature. Heat is going in, moisture isn’t coming out.
- The top of the dryer gets hot. Warm is normal; uncomfortable to rest your hand on isn’t.
- The laundry room feels like a sauna after a load. That’s exhaust escaping into the room instead of leaving the house.
- A faint burnt or scorched smell. Stop using the dryer. This is lint contacting the heating element. Our guide on what causes a dryer burning smell walks through what’s happening and what to check.
- Musty or mildew odor on “clean” laundry. Moisture sitting in the duct and coming back at you.
- Weak or no airflow at the exterior flap while the dryer is running.
- Visible lint around the outside hood or on the wall below it.
- The dryer shuts off mid-cycle. The thermal fuse or high-limit thermostat is doing its job because the machine is overheating. That’s a real warning, not a glitch.
If you’re seeing several of these at once, read through the warning signs of a hot dryer vent before you run another load.
The duct material problem: foil and vinyl versus rigid metal
Not all ducts are equal, and the cheap ones cause most of the trouble.
White vinyl or plastic flex duct
This should not exist in any home, and it hasn’t been code-compliant for a long time. It’s flammable, it kinks, and the ridges grab lint. If you pull your dryer out and find white plastic accordion duct, replace it. That’s not a maintenance issue, it’s a hazard.
Flexible foil (the thin silver accordion type)
Better than vinyl, still poor. Those internal ridges create turbulence, and turbulence drops lint. Foil flex also crushes easily — when you shove the dryer back against the wall, the duct folds behind it and airflow drops by half. Homes with foil flex need cleaning twice as often as homes with rigid pipe.
Semi-rigid aluminum
A reasonable compromise for the short connector between the dryer and the wall. Holds its shape, smoother inside than foil flex, still bendable enough to work in a tight space.
Rigid galvanized or aluminum pipe
The right answer for anything inside a wall, ceiling, or attic. Smooth walls, minimal turbulence, lint mostly blows straight through. Use foil tape at the joints — never sheet metal screws, which stick into the airstream and become lint hooks. Point the male end of each section downstream so the seams don’t catch anything.
If your setup is foil flex running fifteen feet through an attic with four elbows, no cleaning schedule will fully fix it. Rerouting to rigid pipe with fewer turns pays for itself in shorter cycles and a dryer that isn’t cooking itself. Our post on maintaining your dryer to prevent fire hazards covers the whole setup in more detail.
The birds, and the other uninvited guests
Exterior vent hoods are a favorite nesting spot. The flap is a doorway, the duct is a sheltered tube, and the airflow is warm. In Florida you’ll find nesting birds in spring, wasp nests, palmetto bugs, geckos, and the occasional rodent. A nest packed a few feet up the duct can cut airflow to nearly nothing.
Also very common: the flap simply stops working. Lint gums up the hinge and it seizes shut. Or a previous owner painted the whole hood and the louvers are stuck. Or landscaping grew up in front of it — a hedge eight inches from the vent hood is a blockage even if the hood is clean.
Fix: check that flap monthly, keep two feet of clearance around it, and install a proper vent hood with a bird guard. Skip fine mesh screens on the outlet, though. They look like a good idea and they clog with lint within a couple of months, which just moves the blockage rather than preventing it.
Cleaning it yourself: step by step
Budget an hour and a half the first time. You’ll need a rotary dryer vent brush kit (flexible fiberglass rods that couple together, about $30–45 at any hardware store), a drill, a shop vac, a screwdriver, foil tape, and a flashlight.
Step 1: Cut the power
Unplug the dryer at the wall. Don’t just turn it off. If the cord is behind the machine and you can’t reach it, flip the breaker. Again — electric dryers only.
Step 2: Pull the dryer out
Walk it out slowly so you don’t rip the duct off the wall or scratch tile. Get about three feet of clearance.
Step 3: Disconnect and inspect the duct
Loosen the clamp at the back of the dryer and pull the connector off. Look at it in good light. If it’s white vinyl or badly crushed foil, replace it now with semi-rigid or rigid pipe. Cheap and worth doing.
Step 4: Vacuum the dryer’s exhaust port
Get the shop vac hose into the outlet on the back of the machine. There’s usually a surprising amount of lint sitting in the internal blower housing area. While you’re back there, wipe down the dryer’s back panel and vacuum the floor under it.
Step 5: Do the lint screen housing
Pull the screen out and vacuum the slot with a crevice tool, then run the long flexible brush down as far as it goes. Vacuum again. This is often where the biggest single wad comes from.
Step 6: Brush the duct run
Attach the brush head to one rod, chuck the other end in your drill, and feed it into the wall duct. Run the drill clockwise only — reverse rotation unscrews the rods and you’ll leave a brush head stranded inside your wall. Push in a foot or two, pull back, push further, adding rods as you go. Go slow through elbows. Keep the shop vac running at the opening to catch what comes back.
Step 7: Do it from the outside too
Go out to the exterior hood, remove or open it, clear any nest or debris by hand, and brush back toward the house. Cleaning from both ends is what actually gets the run clear. Check that the flap swings freely and clean the hinge.
Step 8: Reconnect and verify
Reattach the duct with clamps or foil tape, keeping the connector as short and straight as you can. Don’t crush it when you push the dryer back — leave four to six inches of space behind the machine. Plug in, run a 10-minute air-fluff or timed cycle, then go outside and feel the flap. Strong steady airflow means you’re done. Weak airflow means there’s still a blockage, likely at an elbow.
If you finish all of that and cycles are still long, the vent probably wasn’t the whole story — a failing heating element, thermostat, or blower wheel can produce the same symptoms. Our post on which parts to check when a dryer isn’t heating is the logical next stop, and if you’d rather not chase it, the team at SkyBreeze Appliance Repair handles dryer diagnostics across Tampa, Wesley Chapel, Land O’ Lakes, and the rest of Pasco County.
When to hand it off
DIY is genuinely fine for a short, accessible, ground-floor run. Bring in a pro when:
- The run is over 20 feet or has three-plus elbows. Consumer rod kits struggle past that, and a stuck brush head inside a wall is an expensive problem.
- The vent terminates on the roof. Tile roof, second story, Florida sun. Not worth it.
- Laundry is on a second floor with the duct dropping through a chase you can’t see.
- You can’t find the exterior termination at all. Some builders vent into soffits or, in bad cases, into the attic itself. An attic-vented dryer dumps gallons of moisture into your insulation and needs to be corrected.
- You cleaned it and airflow is still weak. There’s a collapsed section, a disconnected joint inside the wall, or something lodged in there.
- The dryer trips a breaker, smells burnt, or shuts off mid-cycle even after cleaning. Stop and get it looked at.
- It’s a gas dryer. Licensed gas technician, every time.
Professional vent cleaning in the Tampa area typically runs $100 to $180 for a standard run. Compare that against a dryer working twice as hard for years.
The fire-risk math, plainly
Clothes dryers are involved in roughly 13,000 to 15,000 residential fires a year in the U.S., causing about a dozen deaths, a few hundred injuries, and well over $200 million in property damage. Failure to clean is the leading cause, accounting for around a third of those fires — more than mechanical failure, more than electrical faults.
The mechanism isn’t mysterious. Lint ignites at a low temperature and burns fast. A restricted duct traps heat inside the machine. Trapped heat raises the temperature around the heating element well past its design range. Add lint that has drifted into the cabinet, and you have fuel sitting next to a hot element. The safety thermostat and thermal fuse are supposed to interrupt that, and usually do — but they’re a last line of defense, not a maintenance plan, and they fail. Most dryer fires start in the early evening, when the house is busy and a load has been running for hours.
An hour or two of work once a year takes that risk close to zero. It also shortens your cycles, cuts your power bill, and adds years to a machine — the same compounding effect covered in our appliance lifespan guide. A dryer that runs 45 minutes instead of 90 is doing half the wear on its bearings, belt, and element.
A simple schedule to actually stick to
- Every load: clean the lint screen.
- Monthly: wash the screen with soap and water; check the exterior flap for airflow and blockage; vacuum behind and under the dryer.
- Every 6 months: vacuum the lint screen housing; check that the duct behind the dryer isn’t crushed.
- Every 6–12 months: full duct cleaning from both ends, timed to your household size and duct length.
- Anytime: if cycles get longer or anything smells hot, deal with it that week.
Tie it to something you already do. We tell customers to run the full vent cleaning right before storm season starts, when you’re already checking the house over — the same weekend you’re getting appliances ready for Florida storm season. It’s an easy anchor, and it lands before the months when your dryer works hardest.
If you’d rather have someone handle it, or your dryer is showing symptoms that outlast a good cleaning, give SkyBreeze Appliance Repair a call. We’re out in Tampa, Wesley Chapel, Lutz, Land O’ Lakes, Shady Hills, Hudson, Dade City, Zephyrhills, and The Villages, and we’d much rather clear a duct than replace a burned-out dryer.