What Temperature Should Your Fridge and Freezer Actually Be?
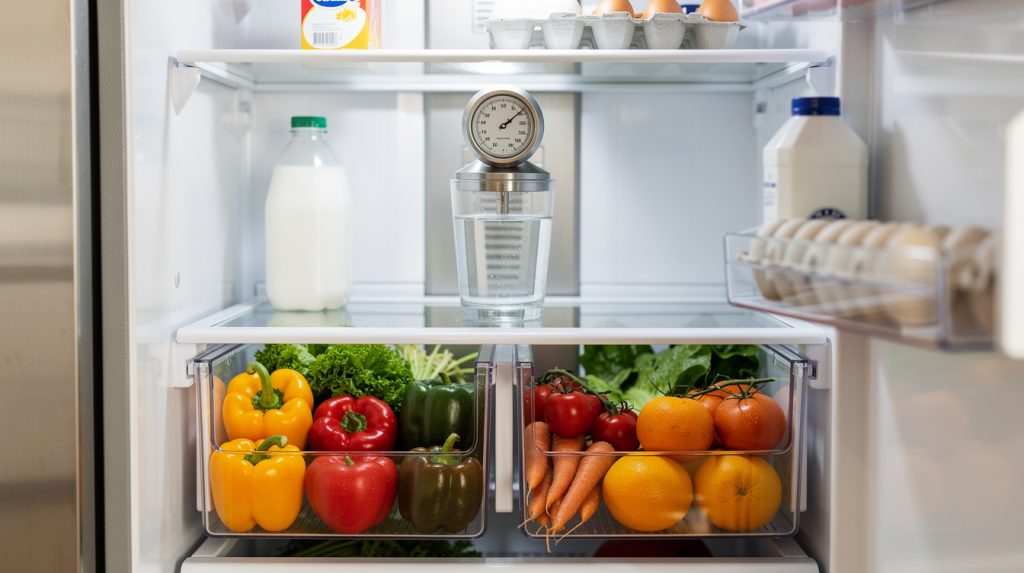
Almost every fridge we open on a service call has the dial sitting at 4. Not because 4 is right, but because 4 is the middle, and the middle feels safe. Then the customer tells us the lettuce keeps freezing, or the milk goes off two days before the date on the jug, and we have to explain the thing nobody ever tells you when you buy the appliance: that number on the dial is not a temperature. It never was.
Getting your refrigerator and freezer to the right temperature is one of the few appliance jobs that costs nothing, takes about ten minutes of actual attention, and pays you back in groceries you didn’t have to throw out. It also happens to be the single best diagnostic you can run at home. A box that won’t hold its numbers is telling you something specific about which part is starting to fail. Here’s how to set it, how to verify it, and how to read what it’s telling you.
The Numbers That Actually Matter
The USDA and FDA both land in the same place, and so does every manufacturer service manual we’ve read:
- Refrigerator: 37°F. The safe range is 35°F to 40°F, but 37°F is the sweet spot. It gives you a few degrees of buffer on both ends.
- Freezer: 0°F. Not “frozen.” Zero. Food frozen at 10°F is technically solid but degrades fast, and ice cream turns grainy.
Why 37 and not 34? Because your fridge is not one temperature. It’s a range, and the compartment swings up and down a few degrees every time the compressor cycles and every time you open the door. Set the average at 37°F and the swings stay inside the safe zone. Set it at 34°F and half the box dips below freezing during the cold part of the cycle, which is exactly how you end up with ice crystals in the spinach and a slushy layer at the bottom of the milk.
Go the other way and set it at 41°F or 42°F, and now you’re living inside the food-safety danger zone, which starts at 40°F. Bacteria that were basically dormant at 37°F start doubling roughly every twenty minutes once you get up into the 50s and 60s. The difference between 38°F and 43°F doesn’t feel like much when you stick your hand in, but it’s the difference between chicken that’s good on day three and chicken that isn’t.
Why the 1-to-7 Dial Lies to You
If your fridge has a dial numbered 1 through 7, or a slider marked “Cold / Colder / Coldest,” those numbers are not degrees. They’re not even a consistent scale between two models from the same brand. What that dial actually does is move a mechanical damper or adjust a thermostat setpoint, and the resulting temperature depends on the room, how full the box is, and how healthy the sealed system is.
On most dial-style refrigerators, higher number equals colder. On a few older Frigidaire and GE units, it’s reversed, and on some the dial only controls the air damper between the freezer and the fresh food side, meaning turning it up makes the fridge colder and the freezer warmer. That last one catches people constantly. They crank the fridge dial to fix warm milk and a week later the ice cream is soft.
Digital models with a numeric readout are better, but not gospel. That display shows the setpoint, or in some cases a smoothed reading from a single sensor near the air inlet. It is not measuring the shelf where your eggs are sitting. We’ve measured 6°F to 8°F of difference between what the panel claimed and what a thermometer read on the middle shelf. The panel isn’t broken. It’s just measuring somewhere else.
How to Actually Verify Your Temperature
Buy a standalone appliance thermometer. The little dial-face ones run about six dollars, digital ones with a probe run fifteen to twenty-five. This is the cheapest appliance tool you will ever own and it settles arguments permanently.
The glass-of-water method (for the fridge)
Don’t just set the thermometer on a shelf and read it. Air temperature bounces around every time the door opens, so you’ll get a number that’s technically real but useless. Instead:
- Fill a glass or small jar with water and put the thermometer in it.
- Set it on the middle shelf, toward the front.
- Leave it alone for at least 8 hours. Overnight is ideal.
- Read it first thing in the morning, before anyone’s been in the door.
The water buffers the reading the same way your food does, so what you get is what your groceries are actually experiencing. That’s the number that matters.
The frozen-food method (for the freezer)
Slide the thermometer between two packages of frozen food, near the middle of the compartment. Same deal: leave it 8 hours, read it cold. If you’re reading above 5°F, adjust down one increment, wait a full 24 hours, and read again. Never make two adjustments in a row without waiting. A refrigerator takes 12 to 24 hours to fully stabilize after a setting change, and if you keep nudging the dial you’ll chase your tail for a week.
Every Fridge Has Cold Spots and Warm Spots
Once you have a thermometer, move it around for a few days. You’ll find your box has a personality. Some general patterns hold across almost every design:
- Back wall, top shelf: coldest spot in the fresh food section, because that’s usually where cold air enters from the freezer.
- Crisper drawers: slightly warmer and much more humid, which is the point. Vegetables want that.
- Bottom shelf, front: often the warmest area of the main cabinet on a top-freezer model.
- The door: the warmest place in the entire appliance, by a wide margin.
Why the door shelf is the worst place for milk and eggs
Manufacturers mold an egg tray into the door because it looks tidy in the showroom, not because it’s a good idea. Every time that door swings open, the shelves attached to it get a full blast of 78°F kitchen air, and in a Tampa kitchen in August it might be closer to 82°F. We’ve clocked door shelves running 8°F to 12°F warmer than the middle shelf in a busy household.
Milk and eggs are two of the most temperature-sensitive things you buy. Put them on an interior shelf, ideally the middle or bottom, toward the back. Use the door for condiments, pickles, jam, soda, salad dressing, and beer. Things that are already acidic, salty, or shelf-stable-ish and don’t care about a few degrees.
Airflow, Overpacking, and the Empty-Fridge Problem
A refrigerator cools by blowing cold air around, not by radiating cold from the walls. Block the airflow and you break the whole system, regardless of what the dial says.
Find the vents. In a top-freezer or side-by-side, there’s usually a slotted opening on the back wall or upper left of the fresh food compartment, plus a return vent lower down. In a French door model, the vents are often along the back wall behind the top shelf. Anything shoved directly against those slots, a jug of tea, a pizza box, a stack of leftovers, will create a cold pocket right at the vent and a warm pocket everywhere else. That’s the classic setup for “my fridge freezes the top shelf but the bottom is warm.”
Aim to keep your fridge about 70 to 80 percent full. Packed wall to wall, air can’t circulate and the compressor runs constantly trying to catch up, which is one of the causes we cover in our guide to a refrigerator that runs constantly and never shuts off. Nearly empty is its own problem, since there’s no thermal mass to hold the cold and the temperature swings hard on every door opening. If you’re heading out of town, leave a few jugs of water in there.
The freezer is different. Freezers actually like being full. Frozen mass holds temperature beautifully. Just don’t block the evaporator vents in the back, and don’t let frost build up over them, which we get into in our post on freezer frost buildup causes and fixes.
Florida Changes the Math
Ambient temperature matters more than people think. Your refrigerator is a heat pump. It moves heat from inside the box to the coils on the outside, and it can only do that if the surrounding air is cooler than the coils. Make the room hotter and the whole process slows down.
Around Tampa, Wesley Chapel, and Land O’ Lakes, we see this most in two places: garage refrigerators and kitchens in older homes where the AC struggles by mid-afternoon. A garage fridge in July, sitting in 95°F air with 70 percent humidity, is working against physics. Standard refrigerators are rated for ambient temperatures of roughly 55°F to 90°F. Above that, the compressor runs nearly nonstop and the freezer often can’t hold 0°F no matter where you set the dial. If you keep a garage unit, look for one rated “garage ready,” keep at least four inches of clearance behind it, and clean the condenser coils twice a year instead of once. Humidity also drives condensation on the door gaskets and inside the box, so seals matter more here than they do up north.
Practical seasonal move: check your thermometer at the start of summer and again around November. It’s normal to need one notch colder in June and one notch warmer in January, especially on a garage or Florida room unit. And during storm season, remember that a full freezer holds safe temperature for about 48 hours unopened, while a half-full one gives you roughly 24. Our guide on protecting appliances during Florida storm season walks through what to do before and after an outage.
When the Fridge “Reads Fine” But Freezes Your Lettuce
This is the complaint we get most, and it’s almost never a settings problem. The display says 37°F, the customer swears they haven’t touched anything, and there’s a sheet of ice under the produce drawer.
What’s happening is that the compartment average is 37°F, but the distribution is wrong. Cold air is dumping into one area instead of spreading out. Usual suspects:
- Stuck air damper. The damper is a small motorized or thermostatic flap that meters cold air from the freezer into the fridge. When it sticks open, cold air pours in continuously, freezing whatever is near the vent while the sensor further away still reads normal.
- Failing thermistor. That’s the temperature sensor. When it drifts, the control board gets bad information and runs the compressor at the wrong times. Drift of 5°F to 10°F is common as they age.
- Items pressed against the vent. The free fix. Pull everything two inches off the back wall and see what changes in 24 hours.
- Crisper humidity slider set wrong. Closed vents trap moisture, and moisture plus a cold spot equals frozen greens.
If moving food around doesn’t fix it within a day or two, you’re into parts territory. We’ve written a deeper walkthrough on why a refrigerator freezes food and how to fix it that covers the damper and thermistor diagnosis in detail. If you’d rather not chase it, the team at SkyBreeze Appliance Repair can pin down which component is off in a single visit, usually with a meter reading rather than guesswork.
When a Temperature Problem Is Really a Failing Part
Adjusting the dial fixes maybe half of temperature complaints. The other half are mechanical, and there are patterns worth knowing before you spend a weekend rearranging groceries.
Dirty condenser coils
The most common cause, and the most preventable. Coils packed with dust and pet hair can’t shed heat, so the box gradually loses the ability to hold temperature, worst on the hottest days. Symptoms: fridge runs constantly, the area near the coils feels very warm, temperatures creep up 3°F to 5°F over a season. Unplug the unit, pull the bottom grille or the rear panel, and vacuum with a coil brush. Twice a year in Florida, more if you have shedding pets. Our step-by-step on cleaning refrigerator condenser coils covers it start to finish.
Defrost system failure
If the freezer holds 0°F fine but the fridge slowly climbs into the mid-40s over several days, suspect the defrost system. A failed defrost heater, thermostat, or timer lets frost blanket the evaporator coil until air can’t pass through it. You’ll often hear the evaporator fan running loud or rattling as it hits ice. Pull the back panel of the freezer, and if you see a solid wall of frost instead of clean fins, that’s your answer.
Bad door seal
Close the door on a dollar bill. If it slides out with no resistance, the gasket has lost its grip. In humid air, a leaky seal also causes condensation and ice buildup around the frame. Details in our post on refrigerator door and seal fixes.
Compressor or sealed system
If the box is warm, the compressor is quiet or humming and clicking off after a few seconds, and the coils are clean, this is where DIY ends. Sealed system and compressor work requires refrigerant certification and specific tools. Call a licensed appliance tech. And if you’re weighing the cost against a new unit, our repair vs. replace cost guide lays out where that line usually falls.
A Ten-Minute Routine That Prevents Most of This
Do this twice a year, once before summer and once before the holidays:
- Verify both compartments with a thermometer using the water-glass method. Target 37°F and 0°F.
- Unplug the unit and vacuum the condenser coils.
- Wipe the door gaskets with warm soapy water and run the dollar-bill test on all four sides.
- Clear anything blocking the interior air vents.
- Move milk and eggs off the door if they’ve migrated back there.
- Check clearance behind and above the unit. Two to four inches minimum.
That routine catches the slow drift before it turns into spoiled groceries. And when something’s genuinely wrong, temperature is usually the first thing to tell you, well before the noises start. If your numbers won’t hold no matter what you do, don’t keep chasing the dial. Give SkyBreeze Appliance Repair a call and we’ll figure out whether it’s a $40 thermistor or something bigger. We cover Tampa, Wesley Chapel, Lutz, Land O’ Lakes, Hudson, Zephyrhills, Dade City, Shady Hills, and The Villages.