Dishwasher Not Heating Water? Why Your Dishes Come Out Cold and Dirty
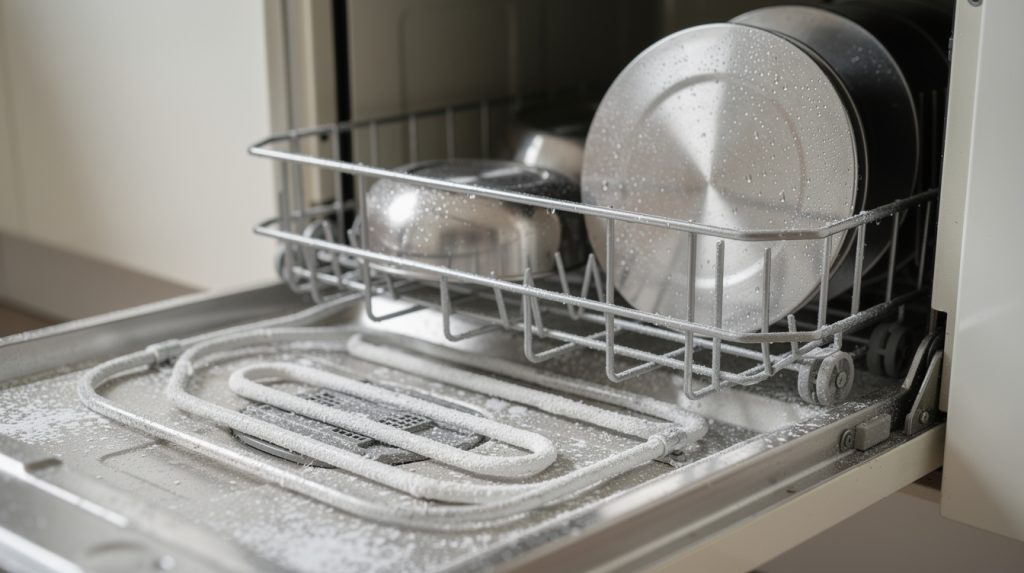
You open the dishwasher after a full cycle, expecting that little puff of steam, and instead you get nothing. The dishes are cool to the touch, still dripping, and the coffee mugs have a tan ring inside that was supposed to be gone. If that sounds familiar, your dishwasher has almost certainly stopped heating its water. It is one of the most common calls we get across Tampa and Wesley Chapel, and most of the causes are cheap parts, not a dead machine.
Hot water is the whole point of a dishwasher. Detergent activates around 120°F, grease only lets go of a plate above roughly 110°F, and the sanitize and heated-dry options depend on the tub reaching 140°F or higher. Take the heat away and the machine is just spraying cold water around for an hour. This guide walks through the symptoms, the parts that fail, how to test them with a multimeter, and a few non-appliance causes that fool a lot of homeowners.
Signs Your Dishwasher Is Not Heating Water
A dishwasher that has lost its heat rarely throws an obvious alarm. Instead, you notice a slow slide in results:
- Dishes come out wet and cold. Normally the tub is warm and steamy at the end of a cycle. If everything is room temperature and pooled with water, the heating element never did its job.
- Greasy, slick plates and glasses. Cold water and detergent cannot break down fats, so you get a filmy, oily feel. This is different from the chalky white film hard water leaves on glasses, though the two can show up together.
- Detergent residue or an unopened pod. Pods are designed to dissolve in hot water. A gooey half-pod in the bottom means the water was likely too cold.
- Cycles that run forever or time out. Modern dishwashers wait for the water to hit a target temperature before moving on. If it never gets there, a 2-hour cycle stretches to 3 or 4, and some models give up and flash a code such as Bosch E09, Whirlpool F3/E1, or a GE heating fault. Our appliance error code cheat sheet covers the common ones.
- Heated dry and sanitize do nothing. If you select Sanitize and the light drops out, the control knows the tub cannot reach temperature.
- Musty smell. Cold, wet dishes in a closed tub grow odors fast in Florida humidity.
If the dishwasher is also leaving food stuck on plates, read our guide on why a dishwasher isn’t cleaning dishes properly, because spray arm and filter issues can mimic a heating fault.
First, Rule Out the Easy Stuff: Your Incoming Water
Before you order a single part, check what the dishwasher is receiving from the house. Plenty of “broken dishwasher” calls in Land O’ Lakes and Lutz end with us pointing at the water heater in the garage.
Run the kitchen tap first
Your dishwasher fills with whatever is sitting in the hot water line under the sink. If that pipe has been idle for hours, the first gallon is room temperature. The element is only meant to boost water that is already warm, not to bring cold water all the way up from 75°F. So before you press Start, run the hot tap at the kitchen sink until it is hot to the touch. Do this for a couple of loads and see whether results improve. It costs nothing and fixes a lot of complaints on its own.
Check the water heater setting
Most manufacturers want incoming water at about 120°F. Many Florida water heaters, especially in snowbird homes and vacation properties around The Villages, get turned down to “vacation” or 100°F and never get turned back up. Put a kitchen thermometer under the hot tap after it has run for a minute. If it reads under 115°F, bump the water heater thermostat up to 120°F. Going much higher raises scald risk and is not necessary.
Look for a partially closed supply valve
The small shutoff valve under the sink can get bumped or corrode half-shut. Low flow means a low fill, and a low fill means the element may not be fully submerged, which shuts the heater off early. If the dishwasher fills slowly, check that valve.
Safety Before You Open Anything
Everything from this point on involves the electrical side of the machine, and the heating element runs on 120 volts at 6 to 8 amps, which is enough to hurt you badly. Before you touch a wire or remove a panel, turn off the dishwasher breaker or unplug the cord under the sink, press Start to confirm it is fully dead, and shut the water supply valve. Keep a towel handy for the water in the sump. If you are not comfortable with any of that, skip to the “DIY or Call a Pro” section below.
The Heating Element: Visible vs. Flow-Through
This is the most common failure, but dishwashers use two very different designs, and knowing which one you have changes everything about the repair.
Visible (exposed) heating element
Older and budget models from Whirlpool, Maytag, Frigidaire, GE, and older KitchenAid units have a thick metal loop across the floor of the tub under the lower rack. It looks like an oven’s bake element and works the same way: current runs through a resistance wire inside the metal sheath and it glows hot. It heats the water during the wash and provides heated dry at the end. Failures here are usually easy to spot. Look for:
- A blister, bubble, or split in the sheath
- A white or rusty crusty spot where the wire burned through
- Heavy chalky scale coating the whole element (more on that in a minute)
- Corroded or melted terminals underneath the tub where the wires connect
Replacing a visible element is a solid DIY job for a handy person, and the part runs $25 to $70. Pull the lower rack, unplug the two wires from beneath the machine (remove the kick plate and often slide the unit out a few inches), loosen two nuts, and lift the old element out. Reinstall with new rubber grommets, because reused grommets are a common cause of a dishwasher leaking from the bottom after an amateur repair.
Flow-through (inline) heater
Bosch, Miele, most LG and Samsung models, and newer KitchenAid and Whirlpool “quiet” dishwashers hide the heater inside the circulation path. Instead of a loop in the tub, there is a tube-shaped assembly attached to the circulation pump under the machine, and water is heated as it is pumped through. That is why these dishwashers have no exposed element and often no heated dry, relying on condensation drying instead.
Flow-through heaters are quieter and more efficient, but harder to reach. The repair means tipping the dishwasher on its back, disconnecting the sump, and swapping a $90 to $220 part. A tech will typically quote $250 to $400 installed, so confirmation matters before you spend that money.
The High-Limit Thermostat
Every dishwasher has a safety thermostat, a small round disc about the size of a nickel, mounted to the bottom of the tub near the element. Its only job is to cut power to the heater if the tub gets dangerously hot, for example if the machine tries to heat with no water in it. Some versions reset on their own when they cool, but many are one-shot and stay open forever.
A tripped or failed high-limit thermostat produces the exact same symptom as a dead element: cold water, wet dishes, long cycles. The part costs $10 to $25 and it is one of the first things we check. On a visible-element machine it sits next to the element terminals under the tub; on flow-through machines it is usually clipped to the heater assembly.
Why do they trip? Usually a low fill (that half-closed valve again), a stuck float switch, or heavy scale on the element causing a hot spot. If a new thermostat trips again in a month, something upstream is the real problem.
The Thermistor or Temperature Sensor
Newer dishwashers do not blindly run the heater for a set time. They read the water temperature with a thermistor, a small sensor whose resistance changes with temperature, and the control board decides when to switch the heater on and off. If the thermistor fails, one of two things happens:
- It reads “already hot” when the water is cold, so the board never switches the heater on. Cold dishes.
- It reads “still cold” when the water is hot, so the board keeps waiting until the cycle times out with a fault code.
Thermistors live in the sump or heater assembly and cost $15 to $40. They fail more often in Florida because humidity and corrosion creep into the connector pins; we see a lot of green crust on sensor plugs in older homes in Zephyrhills and Dade City where the dishwasher has been running for 12 or 15 years.
The Control Board and Heater Relay
If the element, thermostat, and thermistor all test fine, the problem moves upstream to the electronic control board. The board contains a relay, a small electrically operated switch, that sends power to the heater. Because the heater draws more current than anything else in the dishwasher, that relay takes the most abuse, and over years of clicking on and off its contacts pit and burn until one day it stops closing. Clues that point to the board rather than a heater part:
- The element tests good, but you get no voltage at the element terminals during the wash phase.
- A scorched brown spot on the board around one of the relays.
- Other functions are flaky too, such as a cycle that needs a reset every few days.
- The trouble started right after a lightning storm or power outage. Boards in Hudson and Shady Hills take a beating every summer, and our storm season appliance guide explains how to protect against that.
Control boards run $120 to $300, and replacing one is usually a job for a technician because a misdiagnosis is expensive. This is often where the repair versus replace conversation comes up on a dishwasher older than 10 years.
Hard-Water Scale on the Element
Here is the Florida-specific twist. Our well and municipal water across Pasco and Hernando counties is loaded with calcium and magnesium. Every time the element heats, a thin layer of minerals bakes onto it, the same way a kettle scales up, and after a few years a visible element can wear a white jacket a sixteenth of an inch thick. That scale insulates the element so heat cannot transfer into the water, creates hot spots that eventually crack the sheath or trip the high-limit thermostat, clogs the channels in a flow-through heater, and coats the thermistor so it reads slow.
The fix, if the element still works, is to descale. Run an empty cycle on the hottest setting with two cups of white vinegar in a bowl on the top rack, or for heavy buildup pour a cup of citric acid powder in the bottom of the empty tub and run a normal cycle. Citric acid is gentler on rubber seals than vinegar. Repeat monthly on well water.
Our article on how Florida’s hard water damages appliances goes deeper on this, including whether a whole-house softener pays for itself.
Sanitize and Heated-Dry Options: What They Really Do
Heated dry turns the visible element on after the final rinse to bake moisture off the dishes. On flow-through machines it does not exist, so if your dishes are clean but wet and you have a Bosch or similar, the machine may be working exactly as designed. Our dishwasher drying tricks post covers rinse aid, door propping, and other ways to fix that.
Sanitize raises the final rinse to 150°F or more. It is the most demanding job the heater does, so a weak element or a scaled-up sensor will fail the sanitize cycle first, long before regular washes show a problem. If Sanitize started failing six months ago and now every cycle is cold, that timeline fits a slowly dying element or thermistor perfectly.
One tip: if the heater is marginal, switching off heated dry and sanitize reduces the load on the element and can keep the dishwasher limping along until the repair.
Testing the Parts With a Multimeter
A basic digital multimeter costs $15 to $25 and turns this diagnosis into a 20-minute job instead of a guessing game. Power off and unplugged first, every time.
Testing a visible heating element
- Remove the kick plate at the bottom front and locate the two element terminals poking through the tub floor. Unplug both wire connectors.
- Set the meter to ohms (Ω) and touch one probe to each terminal. A good element reads roughly 10 to 30 ohms. A reading of “OL” means the wire inside is broken and the element is dead.
- Now touch one probe to a terminal and the other to the metal sheath. You should get no reading at all. Any continuity to the sheath means the element is shorted to ground and must be replaced, even if the resistance test passed.
Testing the high-limit thermostat
Unplug the two wires from the small disc next to the element terminals and probe each terminal on the ohms setting. At room temperature it should read 0 to 1 ohm (closed). If it reads OL, it is open and needs replacing.
Testing the thermistor
Unplug the sensor and measure resistance across its two pins. Most dishwasher thermistors read between 10,000 and 50,000 ohms at room temperature; the service sheet tucked behind the kick plate lists the exact spec. Warm the sensor in your hand or with a hair dryer and the resistance should drop steadily. A sensor that reads 0, OL, or does not change with heat is bad.
Testing a flow-through heater
Same procedure as a visible element, but you have to get underneath the machine to reach the connector on the heater housing. Expect 15 to 35 ohms on a good unit.
Checking for voltage at the element
This is a live test, so only attempt it if you are already comfortable with a meter. With the wires reconnected, the dishwasher in the main wash phase, and the meter on AC volts, back-probe the two element connectors. You should see around 120V once the tub has filled. Good element plus no voltage means the relay or board is the culprit.
DIY or Call a Pro?
Reasonable to do yourself
- Running the tap hot and setting the water heater to 120°F
- Descaling with citric acid or vinegar, checking the supply valve, cleaning the filter
- Testing the element and thermostat with a meter
- Replacing a visible element or high-limit thermostat on an older Whirlpool, GE, Frigidaire, or Maytag, if you are comfortable pulling the machine partway out
Better left to a technician
- Flow-through heater replacement on Bosch, LG, Samsung, or Miele. The machine has to come out and be tipped, and the sump seals are easy to get wrong.
- Control board diagnosis. Boards are not returnable once installed, and guessing costs $200+.
- Live voltage testing you are not sure about, or any repair on a dishwasher still under warranty.
A professional heating repair typically runs $150 to $350 including the part and labor, and most are finished in one visit. If your dishwasher is more than 12 years old and needs a board plus a heater, that money is usually better spent on a new unit; our appliance lifespan guide has the numbers by brand. If you would rather have someone else sort it out, SkyBreeze Appliance Repair handles dishwasher repair from Tampa and Wesley Chapel up to Hudson and The Villages, and we carry the common elements and thermostats on the truck.
Habits That Keep the Heater Alive
A few simple habits push heater failure back by years:
- Run the hot tap before every load. The less work the element has to do, the longer it lasts.
- Keep the water heater at 120°F. Not 110, not 140.
- Descale monthly on well water, quarterly on city water. Citric acid is cheap and takes zero effort.
- Use rinse aid. It lowers surface tension so dishes dry with less heat, which lets you skip heated dry more often.
- Clean the filter every couple of weeks. A clogged filter restricts circulation and can leave the element working in a shallow puddle, which is the fastest way to trip the high-limit thermostat.
- Put a surge protector on the circuit. A $30 plug-in unit under the sink can save a $250 control board during storm season.
For a fuller checklist, see our 10 expert tips to extend the life of your dishwasher.
Related Articles
- Why Your Dishwasher Isn’t Cleaning Dishes Properly (And How to Fix It)
- 5 Tricks to Get Your Dishwasher Drying Dishes Perfectly Every Time
- How Florida’s Hard Water Quietly Destroys Your Appliances (And How to Fight Back)
- Dishwasher Won’t Start? Here’s How to Troubleshoot It
- How to Extend the Life of Your Dishwasher: 10 Expert Tips