Fridge Warm but Freezer Cold? 7 Causes and How to Fix It
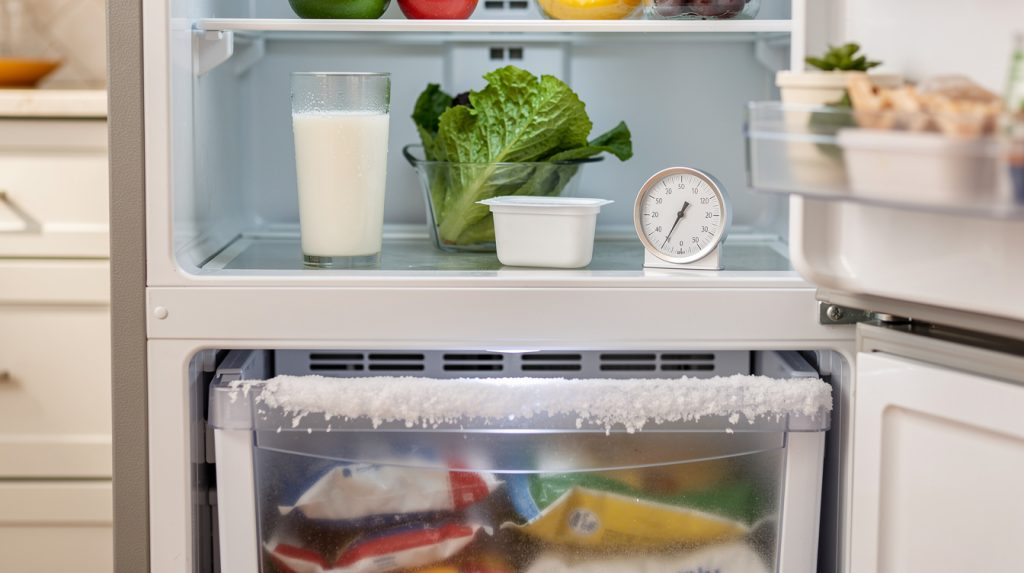
You open the freezer and everything is rock solid. Ice cream, frozen peas, that bag of shrimp from last month, all fine. Then you open the fridge door and the milk feels like it has been sitting on the counter. The lettuce is limp, the yogurt is suspiciously soft, and the thermometer on the shelf reads somewhere in the mid-50s. The compressor is humming away like normal, so what gives?
This is one of the most common refrigerator complaints we hear from homeowners across Tampa and Wesley Chapel, and the good news is that it is also one of the most diagnosable. When the freezer is cold but the fridge is warm, the refrigeration system itself is usually working. The problem is almost always in how cold air gets from the freezer to the fresh food compartment, or in how the fridge decides when to ask for it. Below are the seven causes we see most often, roughly in the order a technician would check them.
Why the Freezer Stays Cold While the Fridge Warms Up
In most top-freezer, bottom-freezer, and side-by-side models there is only one evaporator coil, and it lives in the freezer. That coil is where the cold gets made. A small evaporator fan blows air across it, and that chilled air is pushed through a duct or damper into the fridge section. The fresh food compartment does not make its own cold. It borrows it from the freezer.
So if anything interrupts that airflow, or if the fridge stops asking for cold air at the right time, the freezer keeps chugging along while the fridge slowly climbs toward room temperature. If both compartments are warm, you are looking at a different set of suspects, and our guide on a refrigerator that is running but not cooling walks through those. If only the fridge is warm, keep reading.
A quick reference point: the fridge should sit between 37 and 40 degrees Fahrenheit, and the freezer at or near 0. Our fridge and freezer temperature settings guide explains the dials. A cheap appliance thermometer in a glass of water on the middle shelf gives a far more accurate reading than the built-in display.
1. The Evaporator Fan Motor Has Stopped
This is the number one cause and the first thing a tech checks. The evaporator fan sits behind the back panel of the freezer and pulls air across the coil, then pushes it toward the fridge. If the fan quits, the coil still gets cold and the freezer stays cold by simple proximity. The fridge gets nothing.
How to tell
Open the freezer door and hold the door switch closed with your finger. Listen. You should hear a steady whir from the back of the freezer. If it is silent, or if you hear grinding, chirping, or clicking instead, the fan motor is your problem. A seizing fan often gets loud for a few weeks before it dies, and our article on refrigerator noises and what they mean covers the difference between a struggling fan and a struggling compressor.
Sometimes the fan is fine but its blades are locked in ice, which points to cause number two. Either way, if you take off the back freezer panel to look, unplug the refrigerator first. Fan blades and exposed wiring are not something to poke at with the power on.
The fix
The motor usually runs $40 to $120 depending on brand, and a technician can typically replace it in under an hour. On some newer Samsung and LG models the fan is a DC motor controlled by the main board, so a dead fan is occasionally a board problem. A tech checks for voltage at the fan connector before condemning either part.
2. The Evaporator Coil Is Frozen Solid (Defrost System Failure)
If you pull the back panel off the freezer and find the coil buried in a thick block of white frost, you have found your answer. A healthy coil has a light, even coating. A coil that looks like a snowbank means the automatic defrost system has failed, and the ice has grown so thick that air can no longer pass through the fins. The fan may be spinning perfectly, but it is pushing air into a wall of ice.
The symptoms are sneaky. The fridge often starts out only slightly warm, then gets worse over a week or two as the ice builds. Many homeowners in Lutz and Land O’ Lakes tell us it “just started” when the defrost system actually quit a month earlier. Our guide on freezer frost buildup shows what a defrost failure looks like from inside the freezer.
The three parts of the defrost system
- Defrost heater. A heating element clipped to the bottom of the evaporator coil. Several times a day it switches on for 20 to 30 minutes and melts the frost, which drains to a pan near the compressor. When the heater burns out, frost keeps stacking up.
- Defrost thermostat (bi-metal). A small round sensor clipped to the top of the coil. It closes when the coil is cold enough to need defrosting and opens when the heater has done its job. If it fails open, the heater never gets power.
- Defrost control. A mechanical timer on older units, a function of the main control board (adaptive defrost) on newer ones. If it never enters the defrost cycle, nothing else in the system gets a chance to work.
A technician tests the heater and thermostat for continuity with a multimeter, then checks whether the control is actually sending power during a defrost cycle. Defrost heaters generally cost $30 to $80, thermostats $15 to $40, and mechanical timers $25 to $60. Labor is the bigger portion of the bill since the freezer has to be emptied and partially disassembled.
The 24-hour manual defrost test
Here is a trick that can save you a service call, or at least tell you exactly what to expect from one. If you suspect a frosted coil but do not want to take the freezer apart:
- Move everything from the freezer and fridge into coolers with ice.
- Unplug the refrigerator. Do not just turn the dial to off, since some models keep the control board powered.
- Prop both doors open and lay towels on the floor. In Florida humidity there will be a surprising amount of water.
- Leave it unplugged for a full 24 hours. Twelve is not enough for a thick coil to clear.
- Plug it back in, let it run empty for 6 to 8 hours, then check the fridge temperature.
If the fridge is back to a perfect 38 degrees and stays there for a few days, you have confirmed a defrost system failure. It will happen again in two to four weeks because the broken part is still broken, but now you know exactly what to tell the technician, and the repair can be done in a single visit with the right parts on the truck. If the fridge is still warm after the manual defrost, the coil was not the issue, and you can move down the list.
3. The Damper or Diffuser Control Is Stuck
Between the freezer and the fridge there is a small door called a damper (some manufacturers call it a diffuser or air baffle). It opens and closes to regulate how much cold air the fridge receives. On older refrigerators it is a mechanical flap tied to the fridge temperature dial. On newer ones it is a small motorized door controlled by the main board.
How to tell
Look for a plastic vent housing, usually in the upper back corner of the fridge compartment or along the divider wall on a side-by-side. On many models you can hear the damper motor click and see the flap move when you change the fridge setting. If it stays closed no matter what, or is frozen shut with a chunk of ice around it, cold air cannot get through.
A damper stuck open causes the opposite problem, where lettuce freezes in the crisper. If that sounds more like your situation, see our guide on why a refrigerator freezes food.
The fix
A damper frozen shut usually means humidity is getting in past a worn door gasket. Thaw it with the manual defrost method above, then check the seal. Our article on a refrigerator door that won’t seal shows you the dollar-bill test. If the damper motor itself has failed, the assembly typically costs $40 to $100, and replacement involves removing some interior panels.
4. Blocked Air Vents and Overpacking
This is the cause every technician hopes to find, because the fix is free. Cold air enters the fridge through one or two vents, and it needs room to circulate. If a gallon of milk is pressed against the back wall right in front of the vent, or you did a big Costco run and stacked things floor to ceiling, the air simply cannot move.
We see this a lot in The Villages during the holidays when the whole family visits, and in Zephyrhills and Dade City households that stock up ahead of storm season. A refrigerator needs about 20 to 30 percent empty space to circulate properly.
The fix
- Find every vent in the fridge compartment, usually one at the top back and sometimes one on the side wall, and keep two inches clear in front of each.
- Do not block the return air vent either, often low on the back wall or near the crisper drawers. Air has to flow back to the freezer to complete the loop.
- Check the freezer too. If it is stuffed so full that air cannot reach the fan intake, it will struggle to send anything to the fridge.
Rearrange, wait 24 hours, and recheck. If the temperature comes back down, you are done.
5. A Failed Thermistor or Temperature Sensor
Your fridge decides when to run the fan, open the damper, and call for cooling based on readings from small temperature sensors called thermistors. There is typically one in the fridge compartment, one in the freezer, and sometimes one on the evaporator coil. If the fridge thermistor drifts out of range or fails, the control board may believe the fridge is already cold enough. It closes the damper, idles the fan, and lets the fresh food section warm up while the freezer stays perfect.
How to tell
This one is hard to diagnose by feel. Some brands throw an error code when a sensor goes out of range, and our appliance error code cheat sheet lists the common refrigerator codes. Most of the time, though, a tech confirms it by unplugging the sensor, measuring its resistance with a meter, and comparing the reading to a chart for the expected temperature. A thermistor that reads open, shorted, or wildly off the chart gets replaced.
Thermistors are inexpensive, usually $15 to $40, and are often clipped behind a small cover in the fridge liner. Replacement is quick once the diagnosis is made.
6. Dirty Condenser Coils and the Florida Garage Problem
The condenser coils, underneath or behind the fridge, dump the heat that was pulled out of the inside. When they are coated in dust, pet hair, and the fine sand that gets into everything around Hudson and Shady Hills, the whole system runs hotter and less efficiently. The freezer, closest to the evaporator, still gets cold enough. The fridge, at the far end of the airflow path, suffers first.
Now add a second refrigerator in the garage, which many Florida households have. A Tampa garage in August can hit 100 degrees, and a standard refrigerator is designed for a room between roughly 55 and 90. Push it past that with dirty coils and it may run constantly and still fall short. If yours never cycles off, our article on a refrigerator that runs constantly is worth a read.
The fix
Unplug the fridge, pull it out or remove the lower front grille, and vacuum the coils with a brush attachment. A long, flexible coil brush from the hardware store costs about ten dollars and reaches where the vacuum cannot. Our guide on how to clean refrigerator condenser coils covers it step by step. In a Florida garage this needs to happen every three to four months, not once a year. If the garage fridge is more than ten years old and still struggling after a cleaning, consider moving it to a shaded, ventilated spot or replacing it with a garage-rated model.
7. The Main Control Board
The control board is the brain. It reads the thermistors, drives the damper, runs the evaporator fan, and schedules the defrost cycle. When it develops a fault, it can mimic almost any symptom above. A board that no longer powers the fan, never enters defrost, or misreads a sensor will leave the fridge warm while the freezer looks fine.
How to tell
A control board is the last thing a good technician replaces, not the first. It is diagnosed by elimination: the fan tests good but gets no voltage, the defrost heater and thermostat test good but the board never calls for defrost, the thermistor reads correctly but the damper never opens. Before committing to that conclusion, try a simple power reset. Unplug the refrigerator for five minutes and plug it back in. Our guide on how to reset any appliance explains why this sometimes clears a locked-up board, especially after a power flicker from a summer thunderstorm.
The fix
Boards cost $100 to $350 depending on the brand, and installation is quick once the part is in hand. Lightning surges are a real cause of board failure in this part of Florida. If your fridge is under warranty, a board is often covered, so check before paying out of pocket.
DIY or Call a Pro?
Here is what you can tackle on a Saturday morning and what is better left to someone with a meter and a parts truck.
Safe to try yourself
- Rearranging food and clearing the vents
- Checking the door gasket with the dollar-bill test
- Listening for the evaporator fan with the door switch pressed
- Cleaning the condenser coils (unplugged)
- The 24-hour manual defrost test and a five-minute power reset
Better to call a technician
- Replacing the evaporator fan motor
- Testing and replacing the defrost heater, thermostat, or timer
- Diagnosing a thermistor or damper motor with a meter
- Anything involving the main control board or panels with wiring behind them
Most repairs on this list land between $150 and $350 including labor, with the control board on the higher end. If your refrigerator is under ten years old, repair almost always makes financial sense. If it is pushing fifteen and this is the second or third issue this year, our repair vs. replace cost guide helps you decide. When you are ready for a diagnosis, the SkyBreeze Appliance Repair refrigerator team serves Tampa, Wesley Chapel, Lutz, and the surrounding area, and we carry common fan motors, defrost kits, and thermistors on the truck so most of these jobs get done in one visit.
Prevention: Habits That Keep the Fridge and Freezer in Sync
Most of the failures above are either wear items or the result of a few avoidable habits. A little attention goes a long way.
- Keep the coils clean. Every six months inside the house, every three to four months in a garage or a home with pets.
- Do not overpack. Leave room for air to move, especially in front of the vents and around the freezer fan intake.
- Check the gaskets. Humid Florida air sneaking past a worn seal is the number one source of the frost that freezes dampers and coils. Wipe them with warm soapy water every couple of months and replace them when they crack or stop gripping.
- Let hot food cool first. A pot of soup straight off the stove dumps moisture into the fridge, and moisture becomes frost.
- Use a thermometer. A $5 appliance thermometer catches a slow warm-up weeks before the milk goes bad.
- Protect against surges. A surge protector rated for refrigerators is cheap insurance for the control board. Our article on protecting appliances during Florida storm season has more.
- Listen to your fridge. A new chirp or grind from the freezer is usually a fan motor asking for help before it fails outright.
A warm fridge with a cold freezer feels alarming, but it is one of the more forgiving refrigerator problems out there. Start with the free checks, run the 24-hour defrost test if you suspect ice, and if the problem returns, you will know exactly what to tell the technician. And if you would rather skip the detective work, SkyBreeze Appliance Repair is happy to take it from here.
Related Articles
- Refrigerator Running But Not Cooling? Here’s What’s Failing
- Freezer Frost Buildup: 6 Causes and How to Stop It for Good
- How to Clean Refrigerator Condenser Coils (And Why It Matters)
- What Temperature Should Your Fridge and Freezer Actually Be?
- Refrigerator Running Constantly? 7 Reasons It Never Shuts Off