Garbage Disposal Smells Bad? How to Clean and Deodorize It for Good
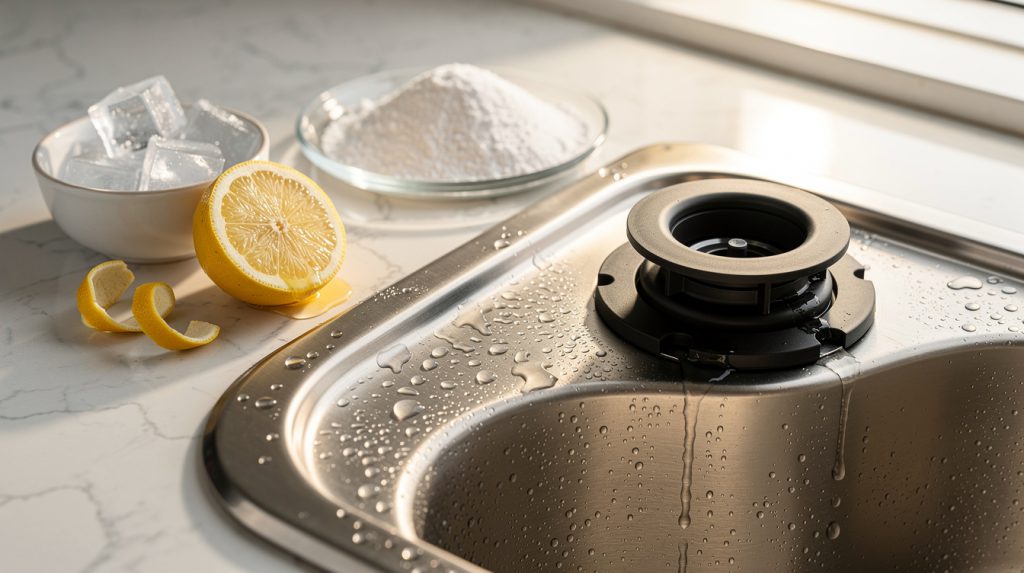
You walk into the kitchen, and there it is again. That sour, slightly rotten smell drifting up from the sink. You have run the disposal, you have rinsed it, maybe you have even poured something down there that promised to fix it. Twenty minutes later the smell is back.
Here is the thing most people do not realize: a garbage disposal almost never smells because of what is in the grind chamber right now. It smells because of what has been building up in the places you cannot see, and because Tampa Bay kitchens sit at 78 degrees and 65 percent humidity for most of the year. The good news is that once you know where the odor actually lives, getting rid of it for good takes about twenty minutes and a few things you already have in the pantry.
Where the Smell Actually Lives
When a homeowner in Wesley Chapel calls about a disposal odor, the first thing a tech does is not run the unit. It is to pull the rubber splash guard up and look underneath. Nine times out of ten, that is the answer. Here are the four spots that hold onto odor, roughly in order of how often they are the culprit.
The underside of the splash guard (baffle)
That black rubber flap with the slits in it keeps water and food from flying back up at you. Unfortunately, the underside of those flaps collects a film of grease, coffee residue, and rotting food particles every time you run the unit. Water rinses the top. Nothing ever rinses the bottom. In a humid Florida kitchen that film turns into slimy, black biofilm within a couple of weeks, and it is often the single biggest source of the smell.
The grind chamber walls and impeller plate
Inside the disposal, the spinning plate has two swinging lugs, or impellers, that push food against a stationary grind ring. Fibrous strings, starchy paste, and grease coat the chamber walls, pack in behind the impellers, and cling to the underside of the grind ring. You cannot see any of this from above, and a quick blast of water does nothing to move it.
The drain trap (P-trap) below the unit
Below the disposal, the discharge pipe runs into a curved P-trap that always holds a few inches of water, which is what blocks sewer gas from rising into your kitchen. That standing water also collects everything that did not quite make it down the line: cooled grease, fine food sludge, and whatever slid past the grind chamber. If the trap is partly clogged, food sits in it and ferments.
The dishwasher drain hose connection
If your dishwasher drains through the disposal (most do), a hose connects to a small inlet on the side of the unit. Greasy dishwasher water flows through it every cycle, and because the hose runs uphill to a high loop or air gap and back down, it never fully drains. If you have both a smelly disposal and a dishwasher that smells bad, that shared connection is very often the link between them.
Step-by-Step: How to Deep Clean a Smelly Garbage Disposal
Do these steps in order. Each one targets a different spot from the list above.
Step 1: Cut the power
Before your hand goes anywhere near the drain opening, switch off the disposal at the breaker or unplug it under the sink. A wall switch is not enough. Switches get bumped, and a disposal does not care whether it was a hand or a carrot inside when it starts. Take the extra thirty seconds.
Step 2: Scrub the splash guard, top and bottom
Most modern splash guards simply lift out. Grab the edge of the rubber and pull straight up. If yours is the older style bolted in with the sink flange, leave it in place and work around it with a brush.
- Scrub both sides with dish soap and an old toothbrush. Pay attention to the underside of each flap and the creases where they meet the ring.
- If the film is stubborn, soak it for ten minutes in warm water with dish soap and a splash of white vinegar.
- Before you put it back, reach into the opening (power is off, remember) with the brush and scrub the upper chamber walls and the top of the grind ring. A flashlight helps here.
If the rubber is cracked, stiff, or torn, replace it. A new splash guard runs $6 to $15 at any hardware store in Land O’ Lakes or Lutz, and a damaged one collects far more gunk than a smooth one.
Step 3: Ice and coarse salt
Restore power, put the splash guard back in, and fill the chamber with two cups of ice cubes and half a cup of coarse salt. Run cold water at a trickle and turn the unit on until the grinding noise stops, usually about thirty seconds. The ice knocks caked-on residue off the impellers and chamber walls, and the salt acts as a mild abrasive scrub.
Step 4: Baking soda and vinegar
With the unit off, pour half a cup of baking soda into the drain and let it sit for ten minutes. Then pour in one cup of white vinegar. It will foam up through the splash guard, which is exactly what you want because that foam works into the crevices the brush could not reach. Let it fizz for ten to fifteen minutes. Baking soda neutralizes acidic odors, and the mild acid in vinegar breaks down the grease film without harming the seals or pipes.
Step 5: Citrus peels
Turn the water on cold, turn the unit on, and drop in a handful of lemon, lime, or orange peels cut into small pieces. The oils leave a fresh scent, and the peel itself scrubs as it grinds. Keep the pieces small. A whole lemon half can jam a weaker unit, which is a different problem covered in our guide on a disposal that hums but won’t spin.
Step 6: Hot water flush
Finish with a full sink of the hottest tap water you can run. Fill the basin, pull the stopper, and turn the disposal on while the whole sinkful drains at once. The volume and pressure push loosened debris through the P-trap and down the branch line, which a slow trickle cannot do. This is the one time hot water is the right call. For everyday grinding, cold water is better because it keeps grease solid so it can be chopped and carried away instead of coating the pipe.
What NOT to Do (Even Though the Internet Says So)
Some common advice for disposal odors will shorten the life of the unit or make the smell worse.
- Bleach. It kills surface bacteria for a day, then the smell returns because the grease film is still there. Worse, chlorine attacks the rubber seals and metal grind components. If you want a disinfectant, vinegar or a splash of hydrogen peroxide is safer.
- Chemical drain cleaners. Products built to dissolve hair clogs are far too caustic for a disposal. They corrode the chamber, damage the seals, and can eat through thin plastic drain fittings. If the disposal is draining slowly, the fix is mechanical, not chemical.
- Coffee grounds. The old tip about grounds “scrubbing” the disposal is backwards. Grounds do not dissolve. They settle in the P-trap as a dense, oily sludge that traps other debris.
- Fibrous vegetables. Celery, corn husks, asparagus, onion skins, and banana peels wrap around the impellers like string and rot in place.
- Grease and oil. Liquid fat goes down easily, cools in the trap, solidifies, and becomes the glue that holds every other odor source together. Wipe pans with a paper towel before rinsing.
- Starchy foods in bulk. Rice, pasta, and potato peels expand and turn into paste. A little is fine. A whole pot is a clog.
Food Smell vs. Sewer Gas: Two Different Problems
Not every bad smell from the sink is a dirty disposal. Rotting food has a sour, fermented, sometimes sweetish odor. Sewer gas smells like rotten eggs, and it tends to be strongest first thing in the morning or when you have been away. If that describes your situation, the disposal is probably clean and the problem is in the plumbing.
A dry P-trap
The water sitting in the P-trap is a seal. If it evaporates, sewer gas rises straight up through the disposal and into the room. Snowbirds returning to The Villages after four months up north often walk into a rotten-egg smell in the kitchen for exactly this reason. The fix is almost embarrassing: run the water for thirty seconds. If you leave the house for the season, pour a cup of water down every drain before you go and a tablespoon of mineral oil on top to slow evaporation. Our snowbird reopening checklist covers this and the other things to check when you get back.
A clogged air gap
That little chrome cylinder on the back of the sink deck is the dishwasher air gap. If it clogs with debris, the dishwasher drain backs up into it, water dribbles out of the top, and the trapped gunk inside starts to stink. Pop the cap off, clean out the inner tube, and run the dishwasher. If water still spits out, the hose from the air gap to the disposal is blocked, which is often the same problem behind a dishwasher that will not drain.
Venting problems
Every drain needs a vent pipe to let air in so water can flow out. If the roof vent is blocked (birds’ nests and palm fronds are common after storm season) or an air admittance valve under the cabinet has failed, the trap can get sucked dry every time a nearby fixture drains. Signs include gurgling after the dishwasher drains and a smell that comes and goes. This is plumber territory, but it is worth knowing so you stop scrubbing a disposal that was never the issue.
Why Florida Makes Disposal Odors Worse
If you moved here from somewhere cooler and suddenly your disposal needs constant attention, you are not imagining it. Bacteria and mold grow far faster in warm conditions, and a Florida kitchen sits in the sweet spot year-round. Add humidity that keeps the underside of the splash guard permanently damp, and the film that took a month to develop up north forms in a week here.
Hard water is the other quiet factor. Much of Pasco and Hernando County runs on well water or hard municipal water, and mineral scale builds up inside the grind chamber and along the drain line. That rough, chalky surface gives grease and bacteria something to grip. Homes in Hudson and Shady Hills on private wells see this most. It is worth reading how Florida’s hard water damages appliances in general.
Older homes in Dade City and Zephyrhills add one more wrinkle. Kitchens built in the 1970s and 80s often have original cast-iron branch lines that are rough inside, so debris hangs up several feet past the trap. A periodic hot-water flush matters more in these houses, and a stubborn recurring smell sometimes means the line needs a professional snaking.
When a Bad Smell Means the Unit Is Failing
Sometimes the odor is the disposal telling you it is done.
A musty, moldy smell inside the cabinet
Open the cabinet under the sink and sniff. If the mildew smell is stronger down there than at the drain, you have a leak. Common sources are the sink flange gasket, the dishwasher inlet fitting, the discharge pipe gasket, or, most seriously, the bottom of the unit itself. Water dripping from the bottom housing means the internal seal has failed and the motor is getting wet. Our guide on finding and fixing a disposal leak walks through each spot. A leaking flange is a $10 fix. A leaking bottom housing is a replacement.
A metallic or rusty smell
Disposals that get regular doses of drain cleaner, or that live in hard-water homes for a decade, develop corrosion on the grind ring and impellers. Food catches on the pitted surface, and you get a smell that is part metal, part rot. Shine a flashlight into the chamber. Heavy orange corrosion on the plate and ring means the unit is near the end of its life. Most disposals last eight to twelve years, and you can see where yours falls in our appliance lifespan guide.
A burning or electrical smell
A hot, acrid smell while the unit runs, especially with humming or the reset button tripping, points to a motor that is overheating. Sometimes that is just a jam, and pushing the red reset button on the bottom after clearing the obstruction solves it. Our guide on fixing a jammed garburator covers the safe way to do that. If the smell returns with no jam present, the motor windings or bearings are failing, and continuing to run it is a fire risk. Shut it off at the breaker and get it looked at.
Slow draining that cleaning does not fix
If you have done the full deep clean and the sink still drains sluggishly, either the impellers have worn down enough that they no longer grind food fine, or the discharge line is scaled and clogged. Because the disposal and dishwasher share that drain path, a lot of these calls start as a dishwasher complaint. If you are in the Tampa area and not sure which appliance is at fault, SkyBreeze Appliance Repair can check both on the same visit; our dishwasher repair service covers the shared drain connection as well as the disposal itself.
DIY or Call a Pro?
Most disposal odors are a DIY job.
Handle it yourself when:
- The smell is sour or food-like and gets better after cleaning. That is a maintenance issue, not a repair.
- The splash guard is the obvious culprit and just needs a scrub or a $10 replacement.
- A rotten-egg smell disappears after running the water for a minute (dry trap).
- The air gap is clogged and cleans out easily.
Call for help when:
- Water is dripping from the bottom of the disposal housing.
- You smell burning or the reset button trips repeatedly.
- The unit is visibly corroded inside and more than eight years old.
- The sewer smell persists with a full trap and clean air gap, which points to a venting or line problem (a plumber, in that case).
- The disposal and dishwasher are both draining poorly and you cannot tell where the blockage is.
Cost-wise, a service call to clear a drain connection or replace a flange gasket typically runs $100 to $200 in the Tampa area. A full disposal replacement, including a mid-range half-horsepower unit and labor, usually lands between $250 and $450. If the unit is over ten years old and the repair estimate is more than half of that, replacement is the smarter spend. Our repair vs. replace cost guide lays out the math.
A Simple Routine That Keeps the Smell From Coming Back
Deep cleaning fixes the problem. Habits keep it fixed.
- Every use: Run cold water before you turn the unit on, keep it running while you grind, and let it run for fifteen to twenty seconds after the grinding sound stops. That last part carries the debris past the trap instead of leaving it there.
- Every few days: If you have not run the disposal, run it anyway with cold water for ten seconds. Food that sits in a Florida kitchen for two days is already going.
- Weekly: Lift the splash guard and wipe the underside with a soapy sponge.
- Monthly: Ice and coarse salt, followed by the baking soda and vinegar fizz. Toss in a citrus peel afterward if you like.
- Every few months: Do the full-sink hot water flush and clean the air gap.
- Before a long trip: Run the unit clean, flush it, and add a bit of water and a spoonful of mineral oil so the trap does not dry out.
Our full garbage disposal maintenance guide goes deeper into the care schedule if you want the long version.
A garbage disposal is one of the least glamorous appliances in the house, but it is also one of the easiest to keep happy once you understand where the trouble hides. Clean the underside of that splash guard, respect the trap, keep the grease out, and the sink will smell like nothing at all. And if the odor turns out to be a leak, a tired motor, or a drain problem shared with the dishwasher, SkyBreeze Appliance Repair is happy to sort it out anywhere from Tampa up through Zephyrhills and Dade City.
Related Articles
- How to Maintain Your Garbage Disposal for a Long and Trouble-Free Life
- Garbage Disposal Leaking? How to Find the Leak and Fix It
- Garbage Disposal Humming But Not Spinning? Here’s the 10-Minute Fix
- Garburator Not Working? How to Fix a Jammed Garbage Disposal
- Why Your Dishwasher Smells Bad (And How to Fix It)